

Connect with MetaMask Wallet
This guide will walk you through the process of connecting your MetaMask wallet to Belong.net. By following these steps, you'll be able to:
- Connect your MetaMask wallet securely
- Verify your NFT ownership
- Create and access your Belong.net account
Prerequisites
Before you begin, make sure you have:
- MetaMask wallet installed in your browser
- Some ETH in your wallet for potential transactions
- A modern web browser (Chrome, Firefox, or Brave recommended)
Initial Connection
Step 1. Access Belong.net
Navigate to https://app.belong.net/ to begin the connection process.
Step 2. Connect Your Wallet
Look for and click the "Connect Wallet" button in the top navigation bar.

Step 3. Select MetaMask
Choose MetaMask from the available wallet options.
💡 MetaMask is recommended for its security and wide compatibility.

Wallet Authentication
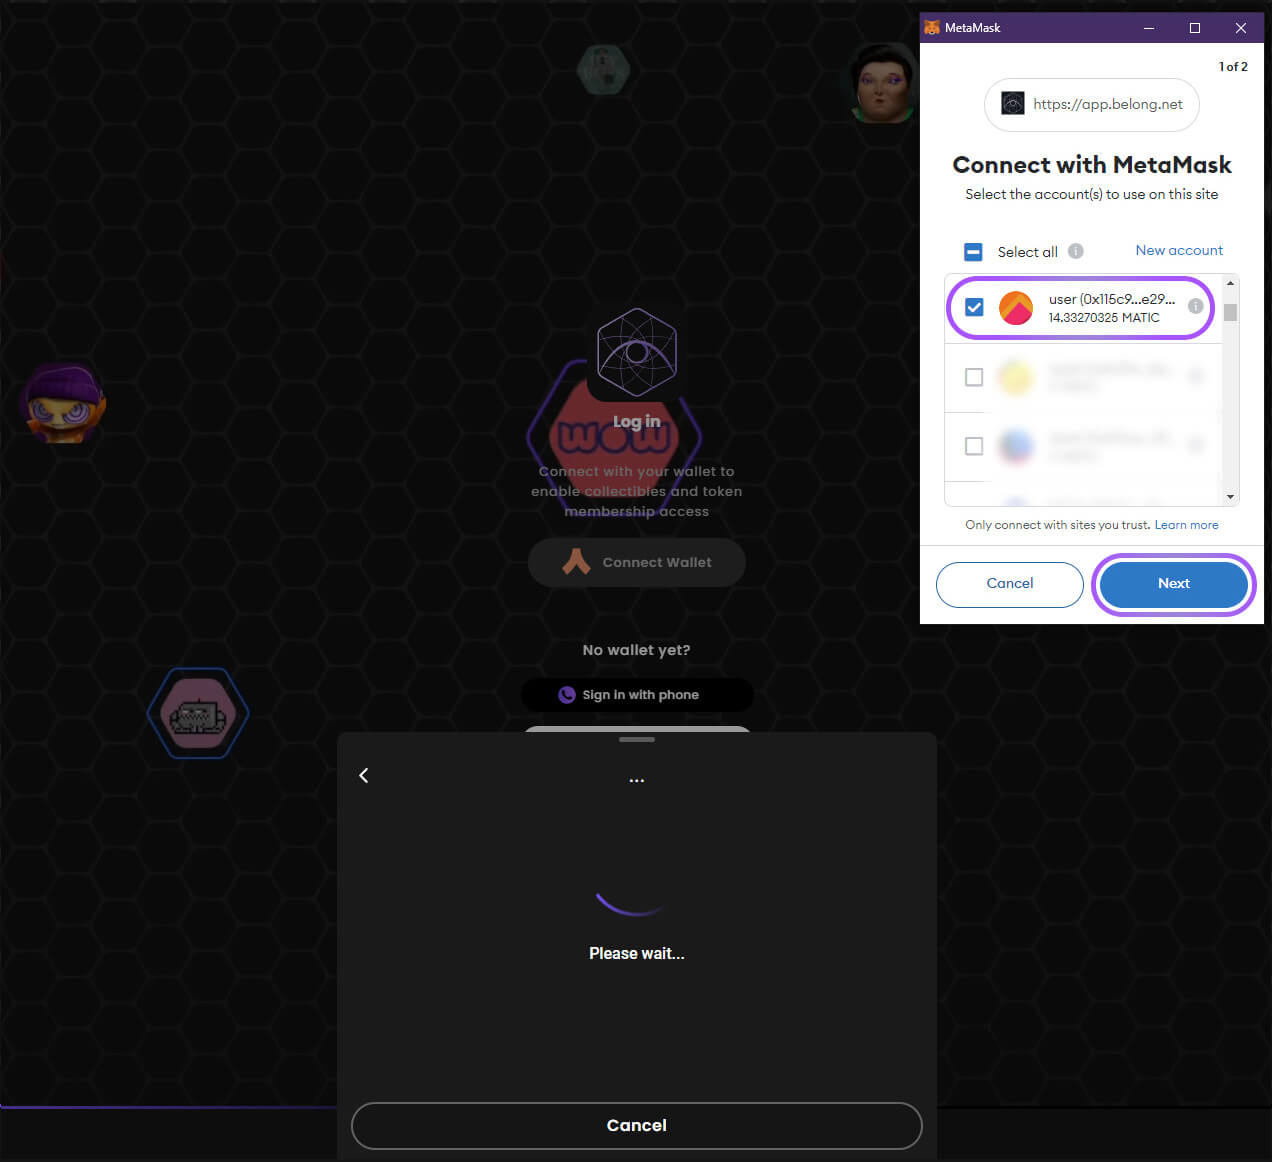
Step 4. Connect Account
Select your MetaMask account and click "Next" to proceed with the connection.
📌 Make sure you're using the correct account if you have multiple ones in MetaMask.
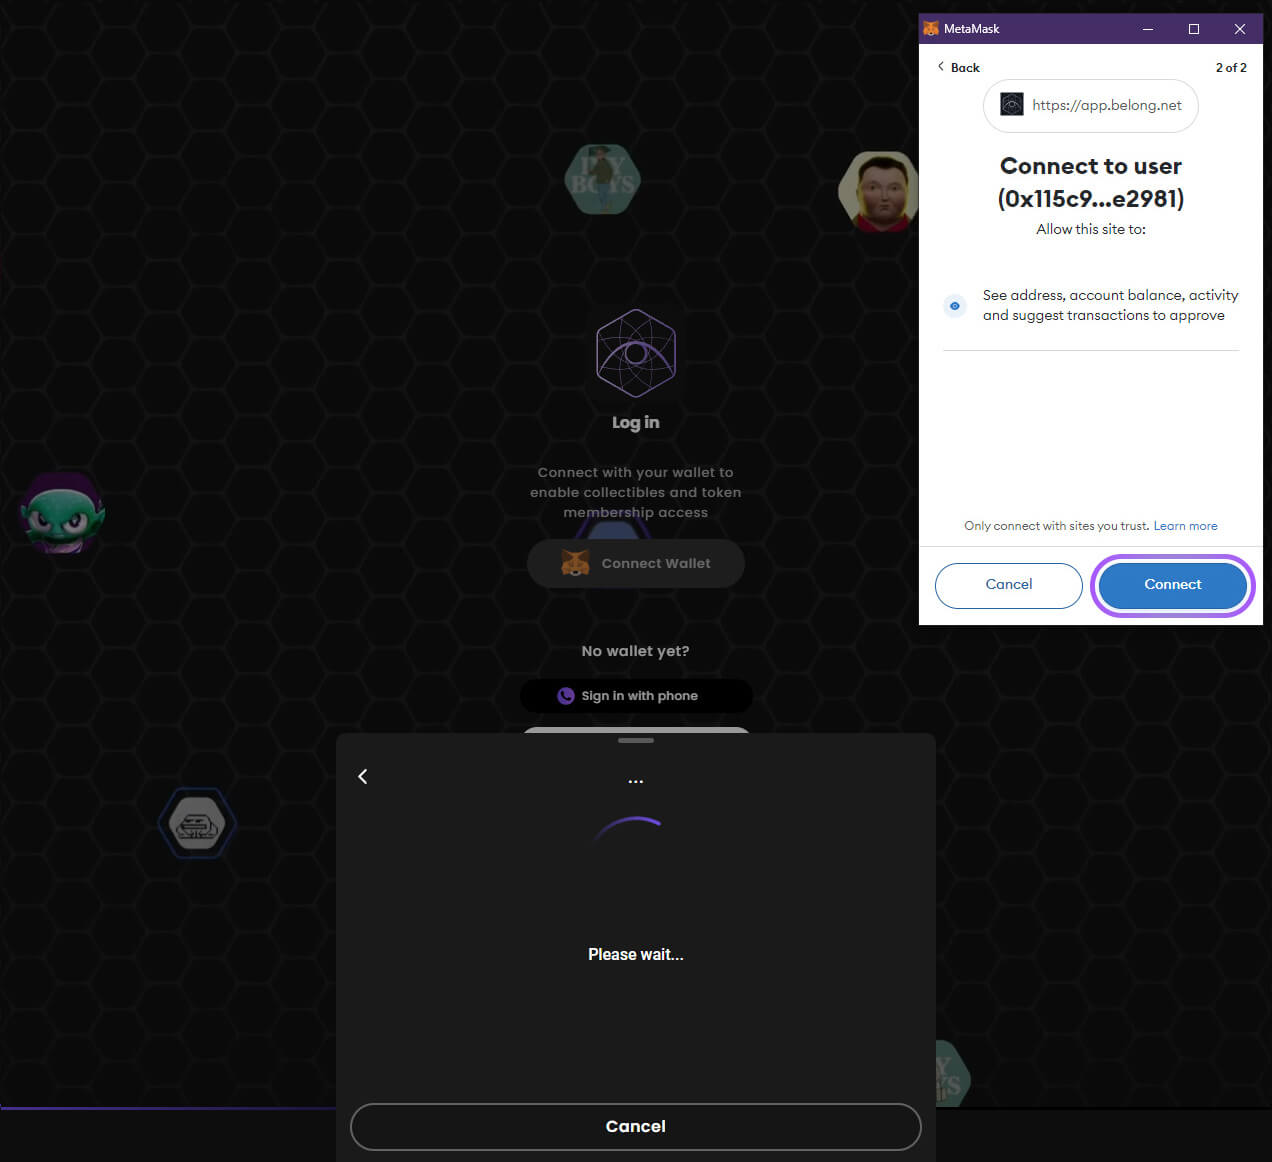
Step 5. Grant Permissions
Click "Connect" to allow Belong.net to:
- View your wallet address
- Check your account balance
- Monitor activity
- Request transaction approvals
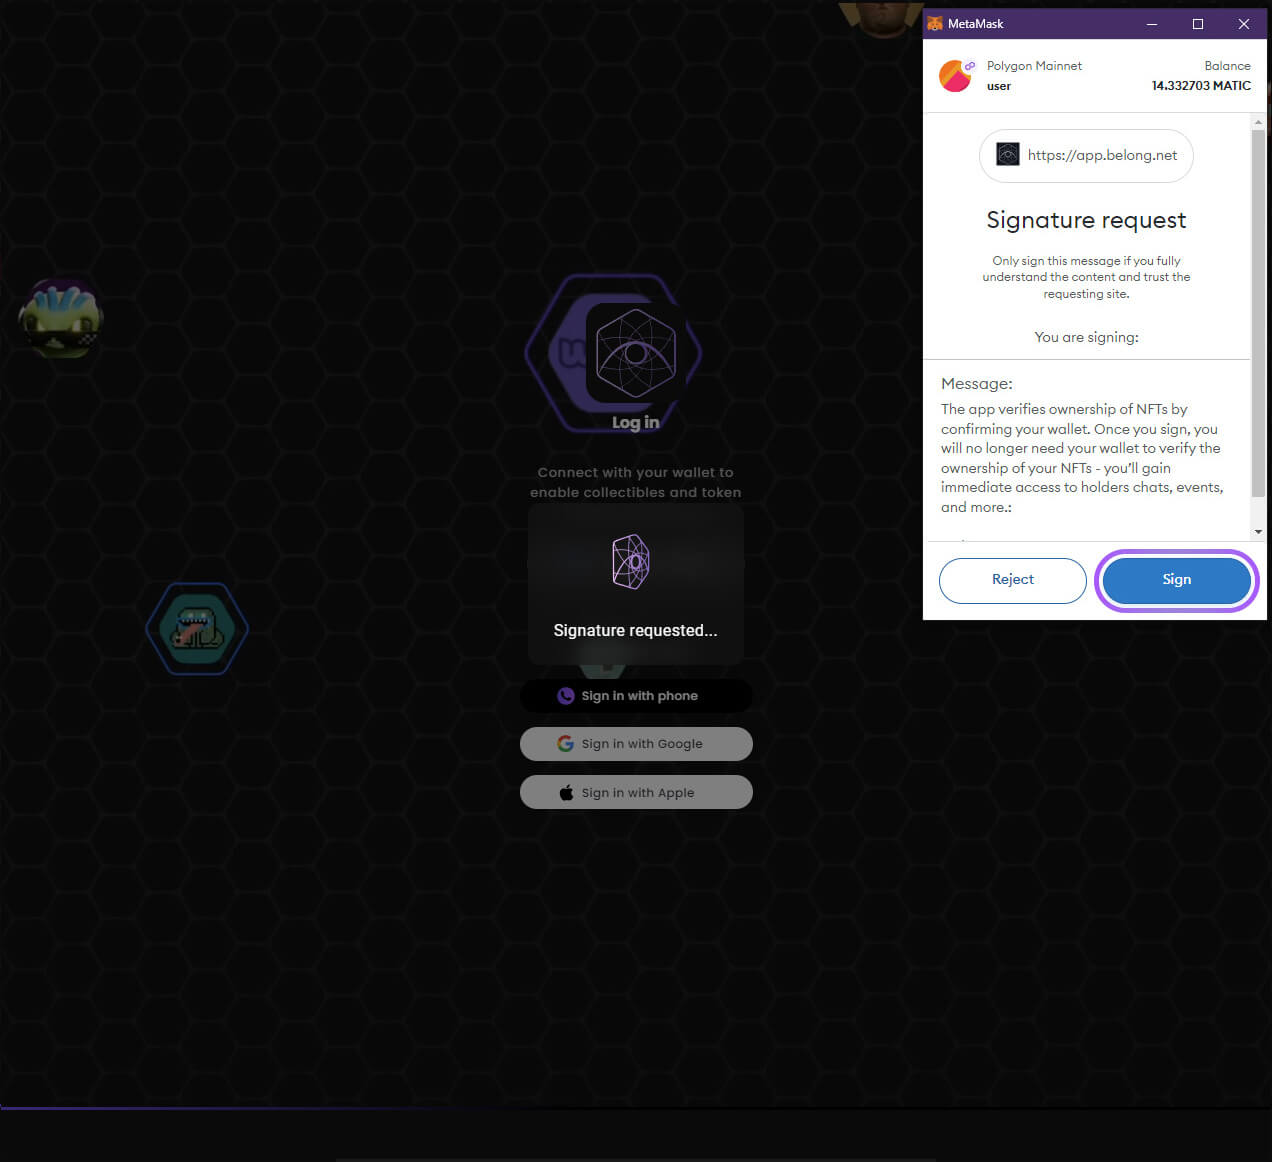
Step 6. Verify Ownership
Sign the verification message to confirm your NFT ownership.
⚠️ This is a secure, gas-free signature request - it won't cost you any ETH.
Account Setup
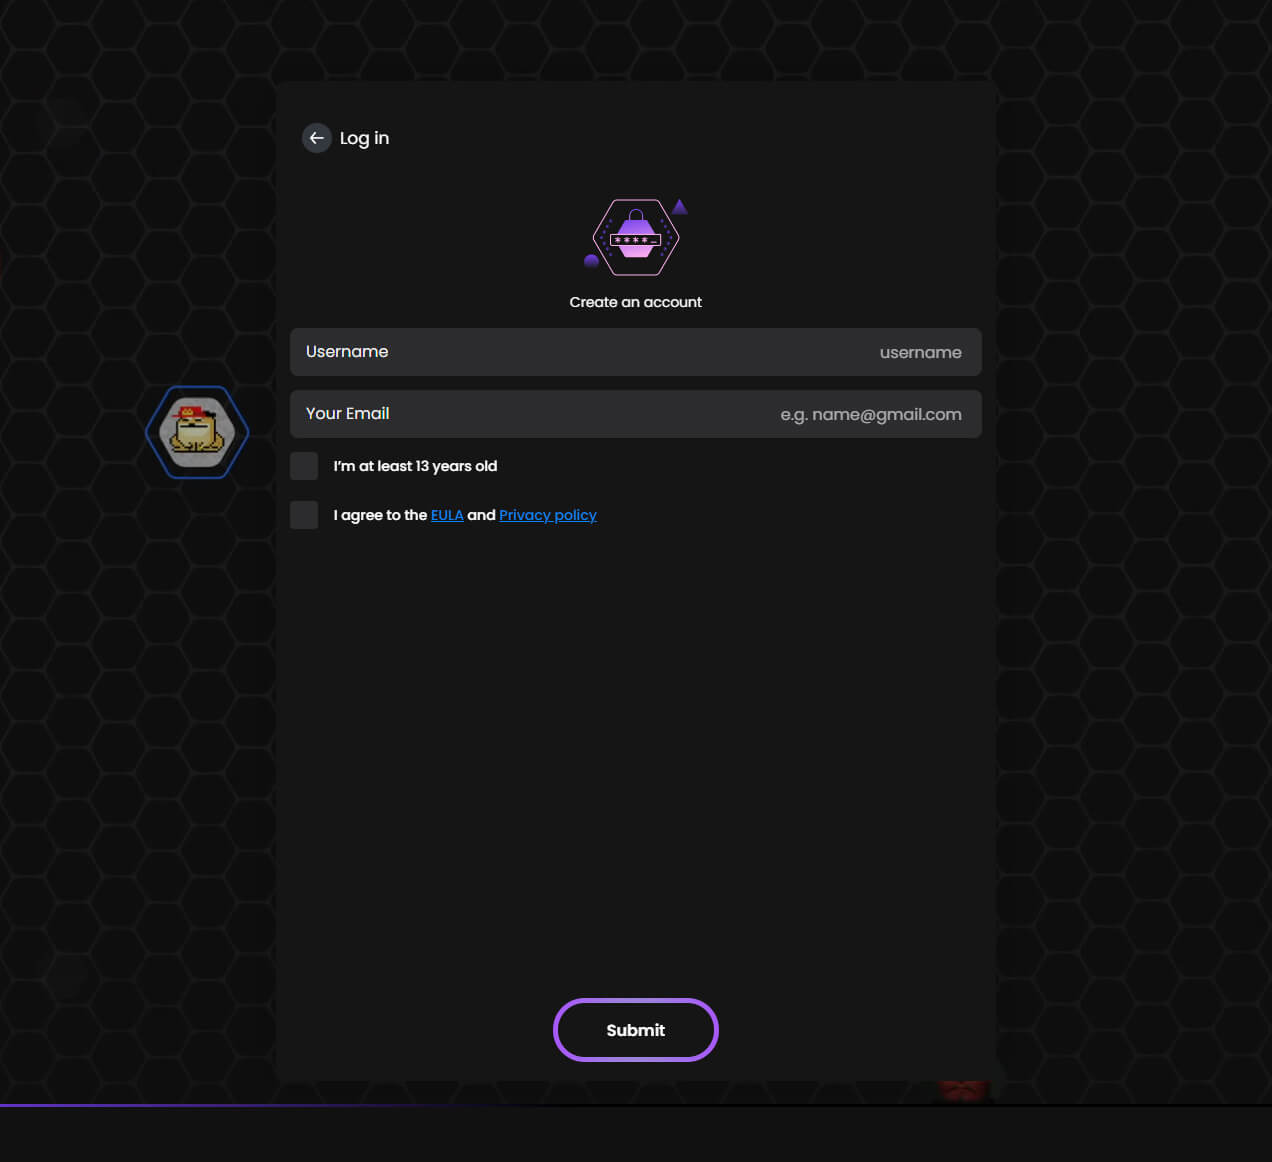
Step 7. Complete Registration
Create your Belong.net account by:
- Entering your username/email
- Accepting the Year Pass agreement
- Reviewing and accepting the EULA
- Agreeing to the Privacy Policy
- Clicking "Submit" to finalize
💡 Your email will be used for important notifications and updates.
What's Next?
After successfully connecting your wallet and creating an account, you can:
- Create NFT collections
- Participate in NFT-gated events
- Join communities and hubs
- Start building your Web3 presence
🎉 Congratulations! You're now ready to explore everything Belong.net has to offer.