

Create Product Collection
This guide will walk you through the process of creating and launching your own NFT collection on Belong.net. By the end, you'll have:
- A fully configured NFT collection ready for minting
- Custom settings for pricing and distribution
- Optional features like whitelisting and royalties set up
Initial Setup
Step 1. Open Belong.net
Navigate to https://app.belong.net/ to begin the process.
Step 2. Connect Your Wallet
Look for and click the "Connect Wallet" button in the top navigation bar.

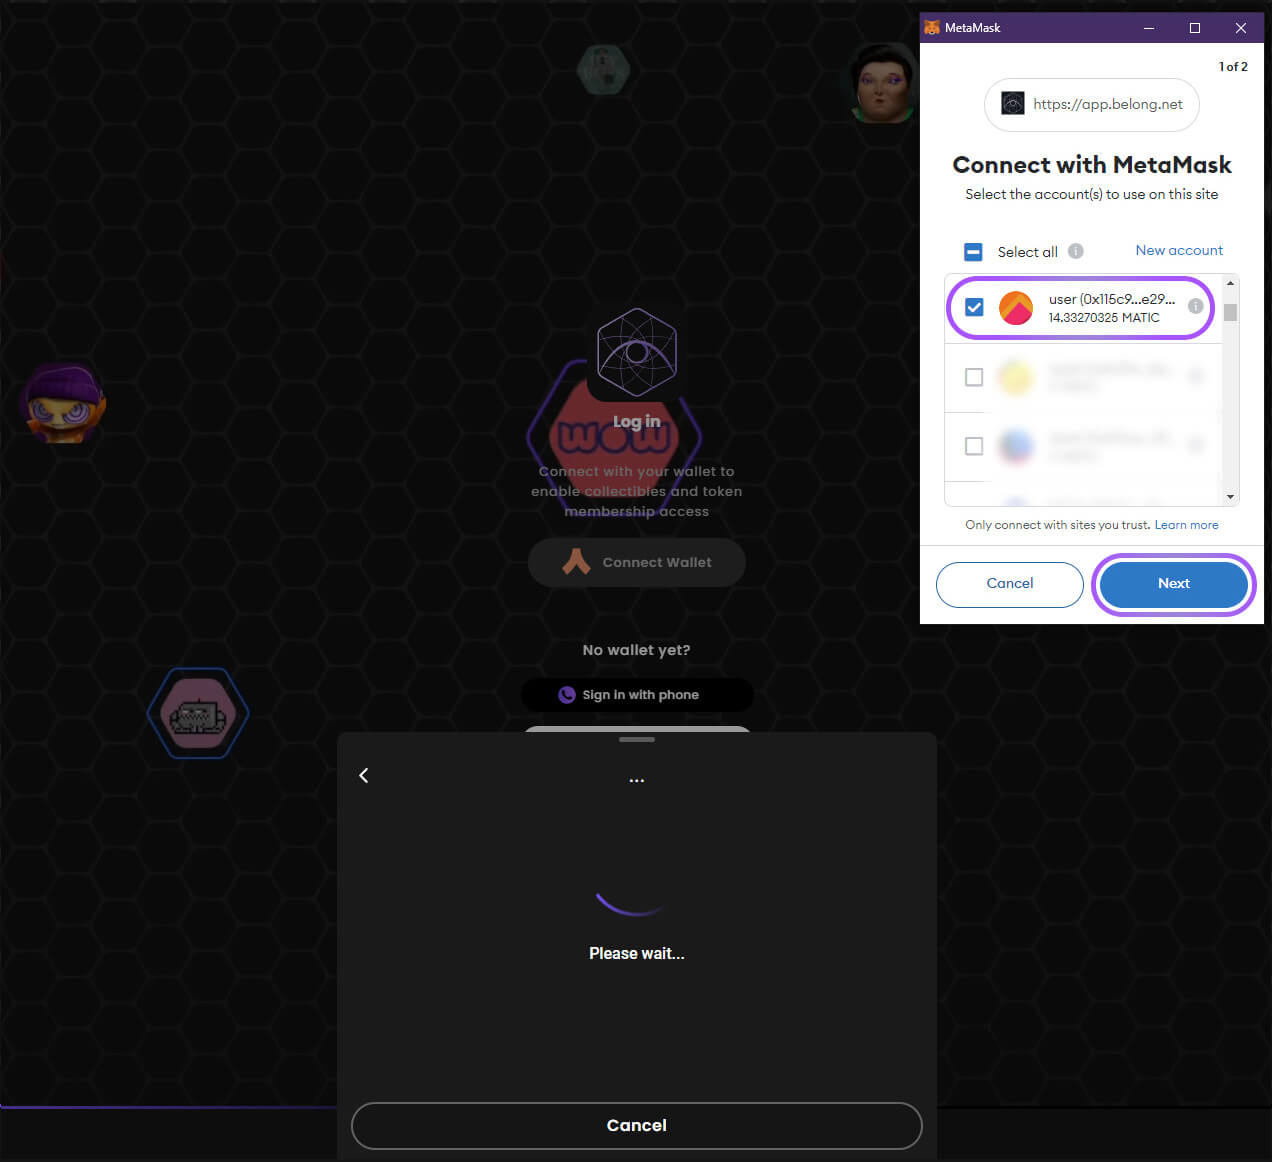
Step 3. Choose Wallet Provider
Select your preferred wallet provider. MetaMask is recommended for beginners.

Step 4. Connect MetaMask
Select your MetaMask wallet and click "Next" to proceed.
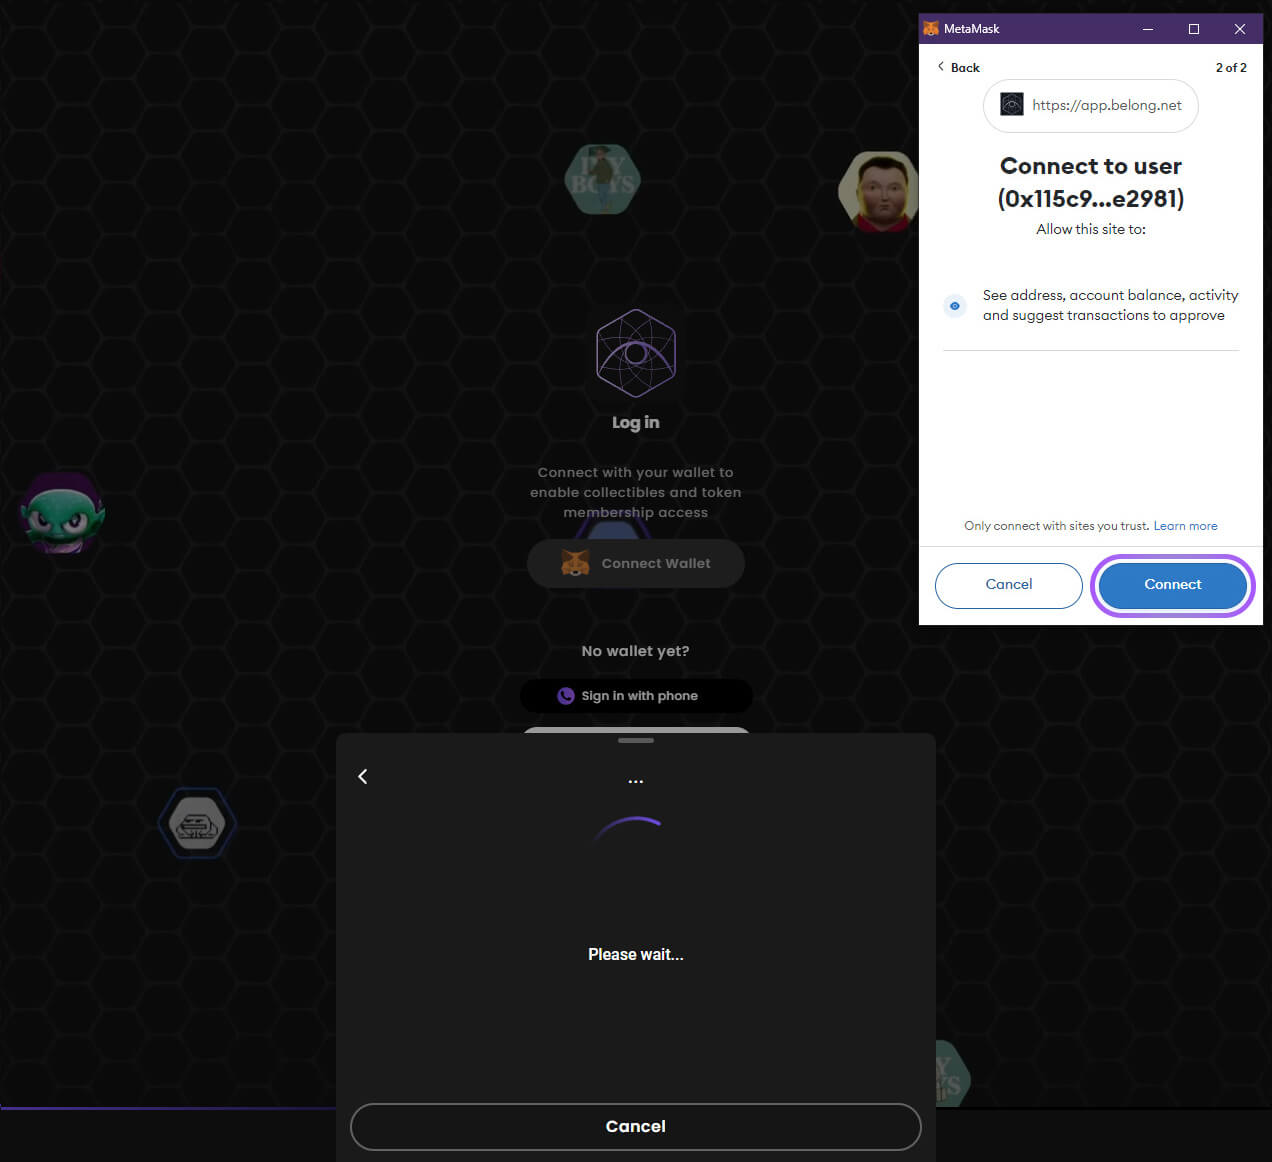
Step 5. View Account Details
Click "Connect" to grant access to view your:
- Wallet address
- Account balance
- Activity history
- Transaction approvals
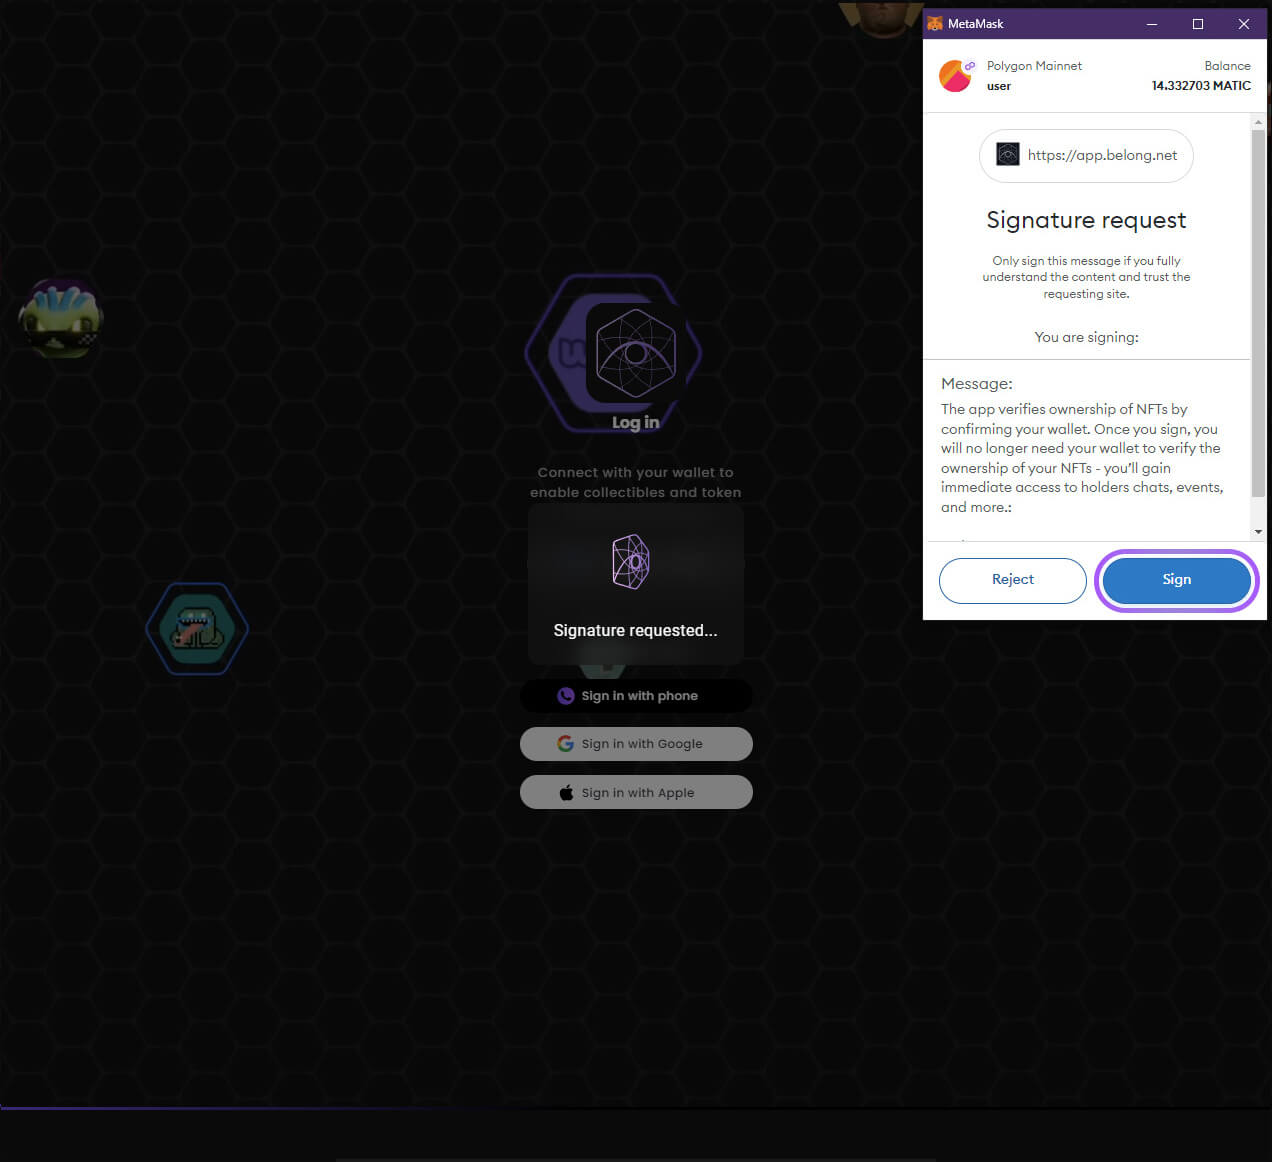
Step 6. Verify Ownership
Sign the message to verify your NFT ownership. This is a secure, gas-free operation.
Account Creation
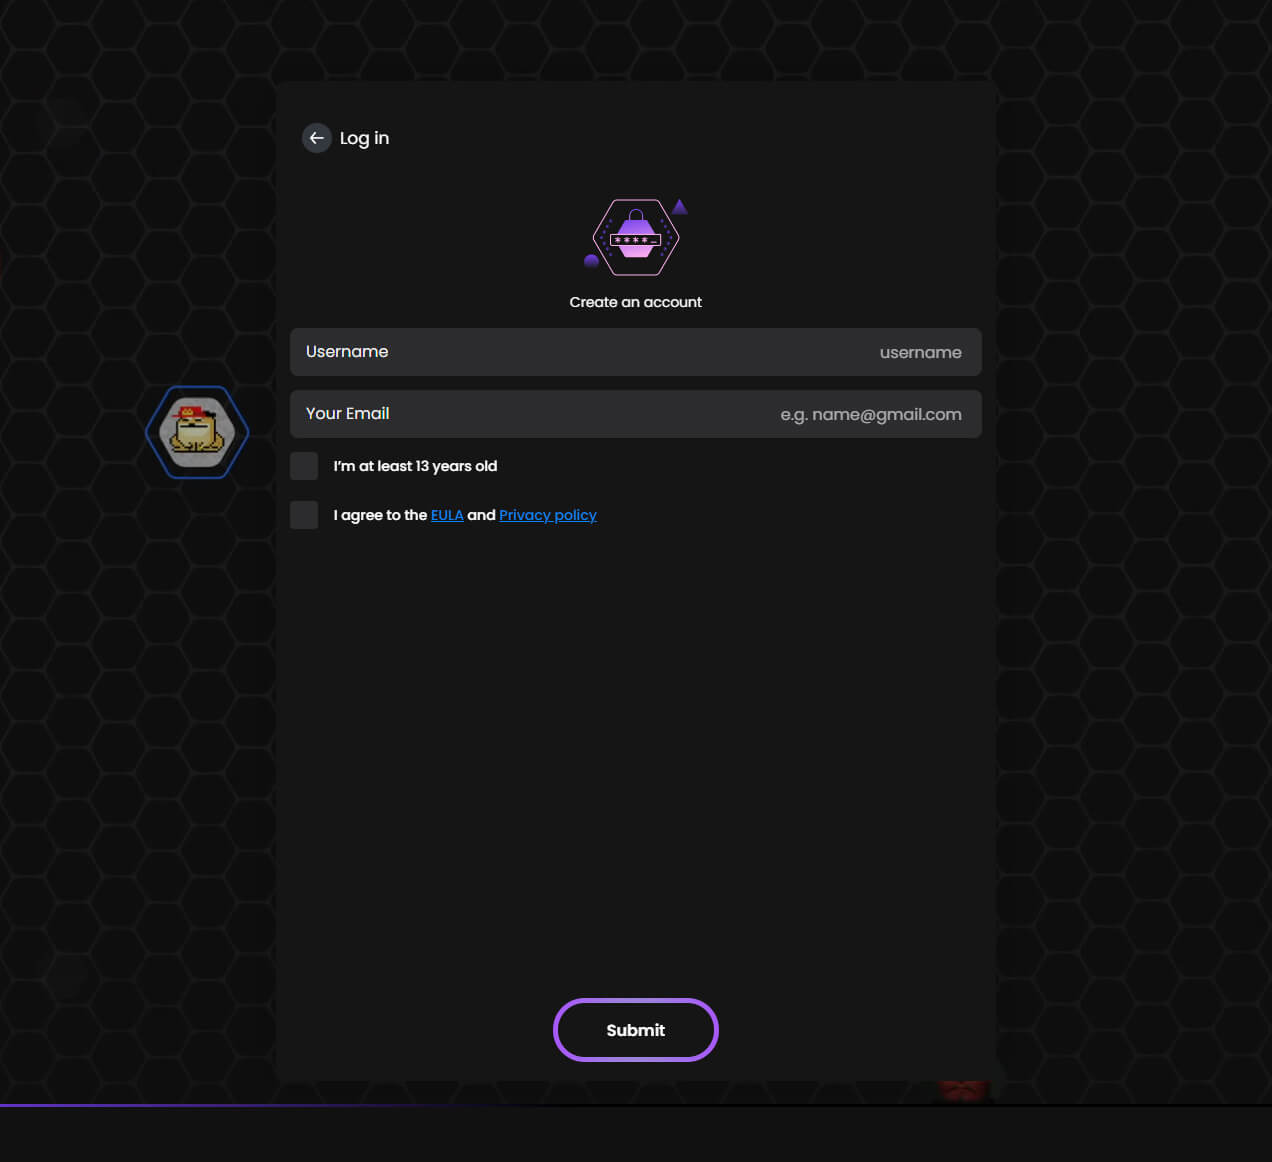
Step 7. Create Account
Fill in your account details:
- Username/email
- Accept the Year Pass agreement
- Review and accept EULA and Privacy Policy
- Click "Submit" to create your account
Step 8. Enable Location
Enable location services to discover nearby people and events.
💡 This helps you connect with local communities and find relevant events in your area.
Creating Your Collection
Step 9. Open Action Menu
Click the "Plus" icon to access the creation menu.
![]()
Step 10. Create NFT Tickets
Select "Create NFT Tickets" to start your NFT-gated event setup.
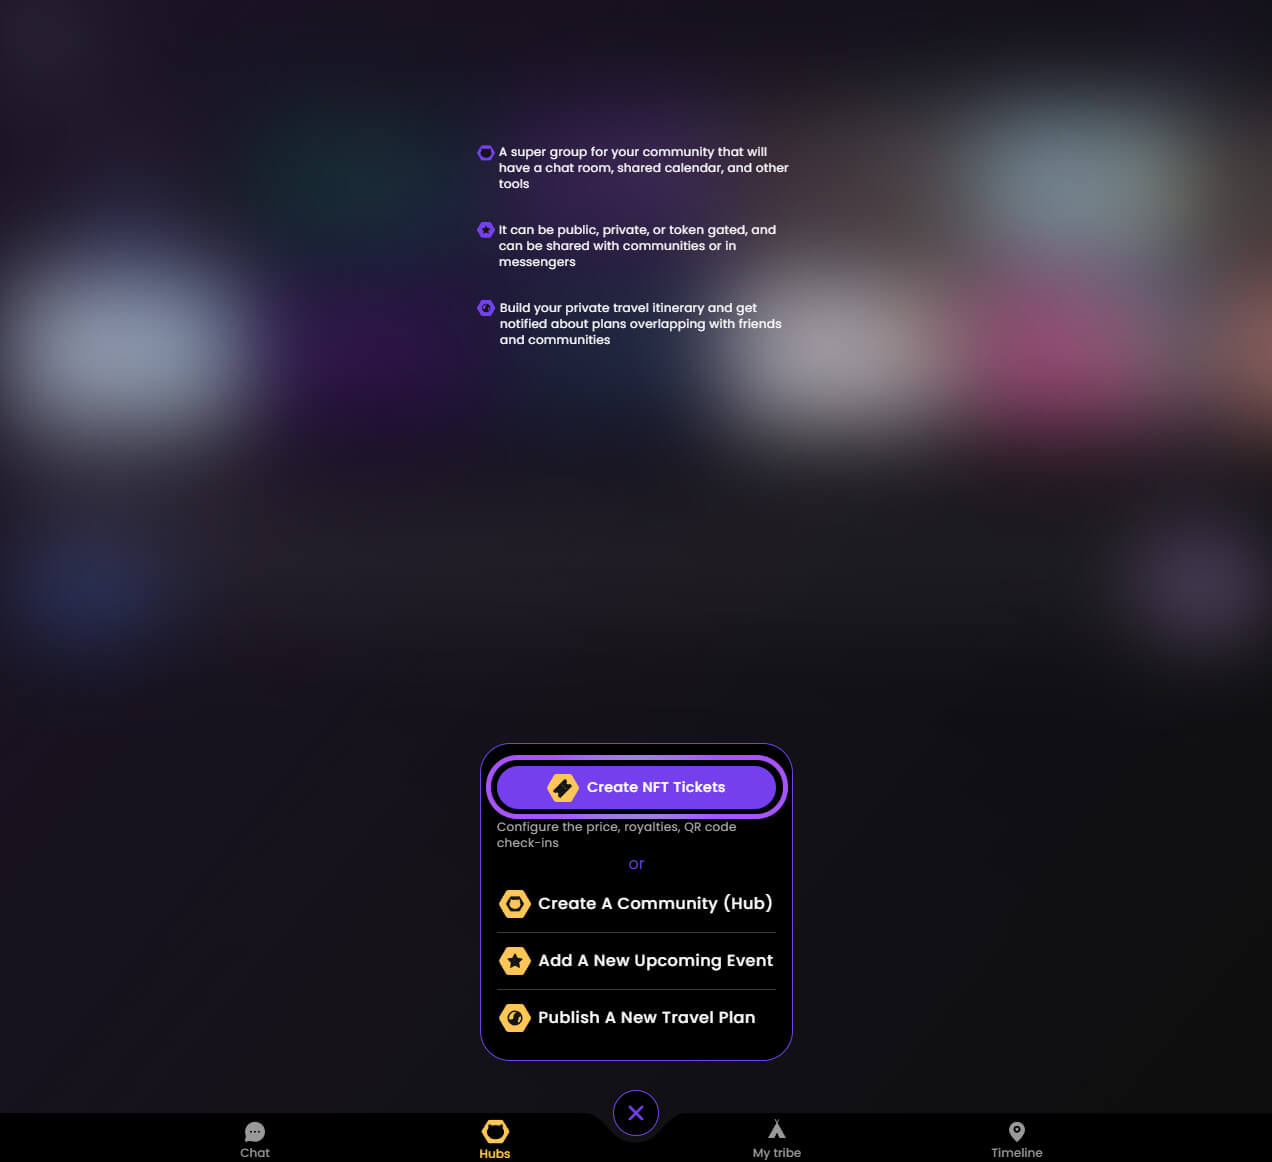
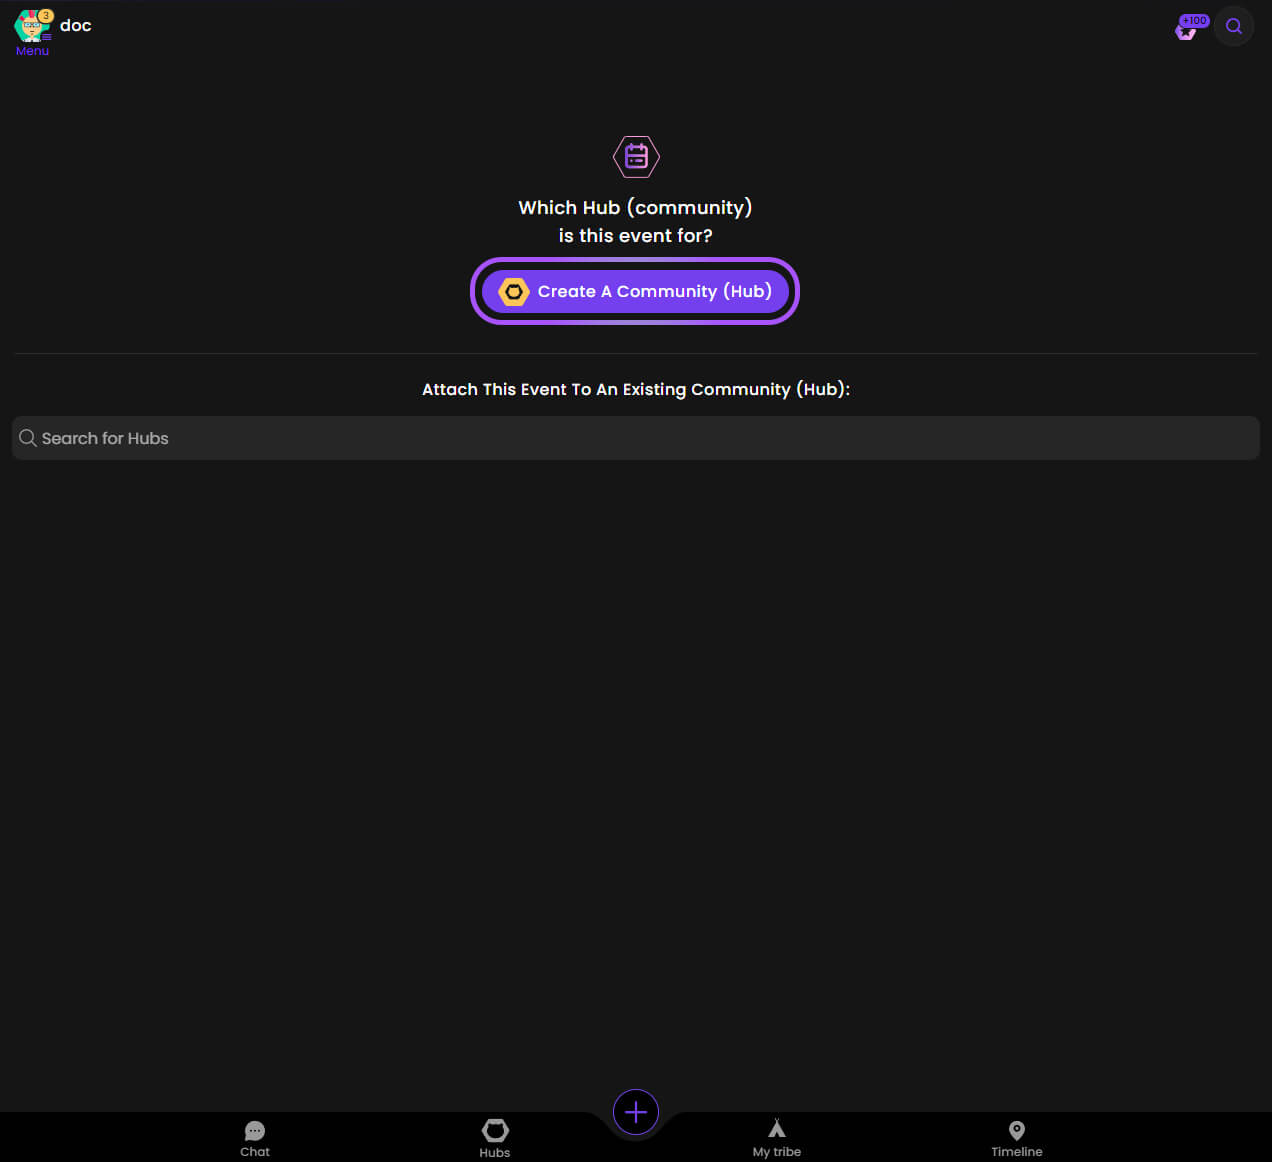
Step 11. Select or Create Hub
Either create a new Community Hub or choose an existing one.
📌 Hubs help organize your collections and build community around your NFTs.
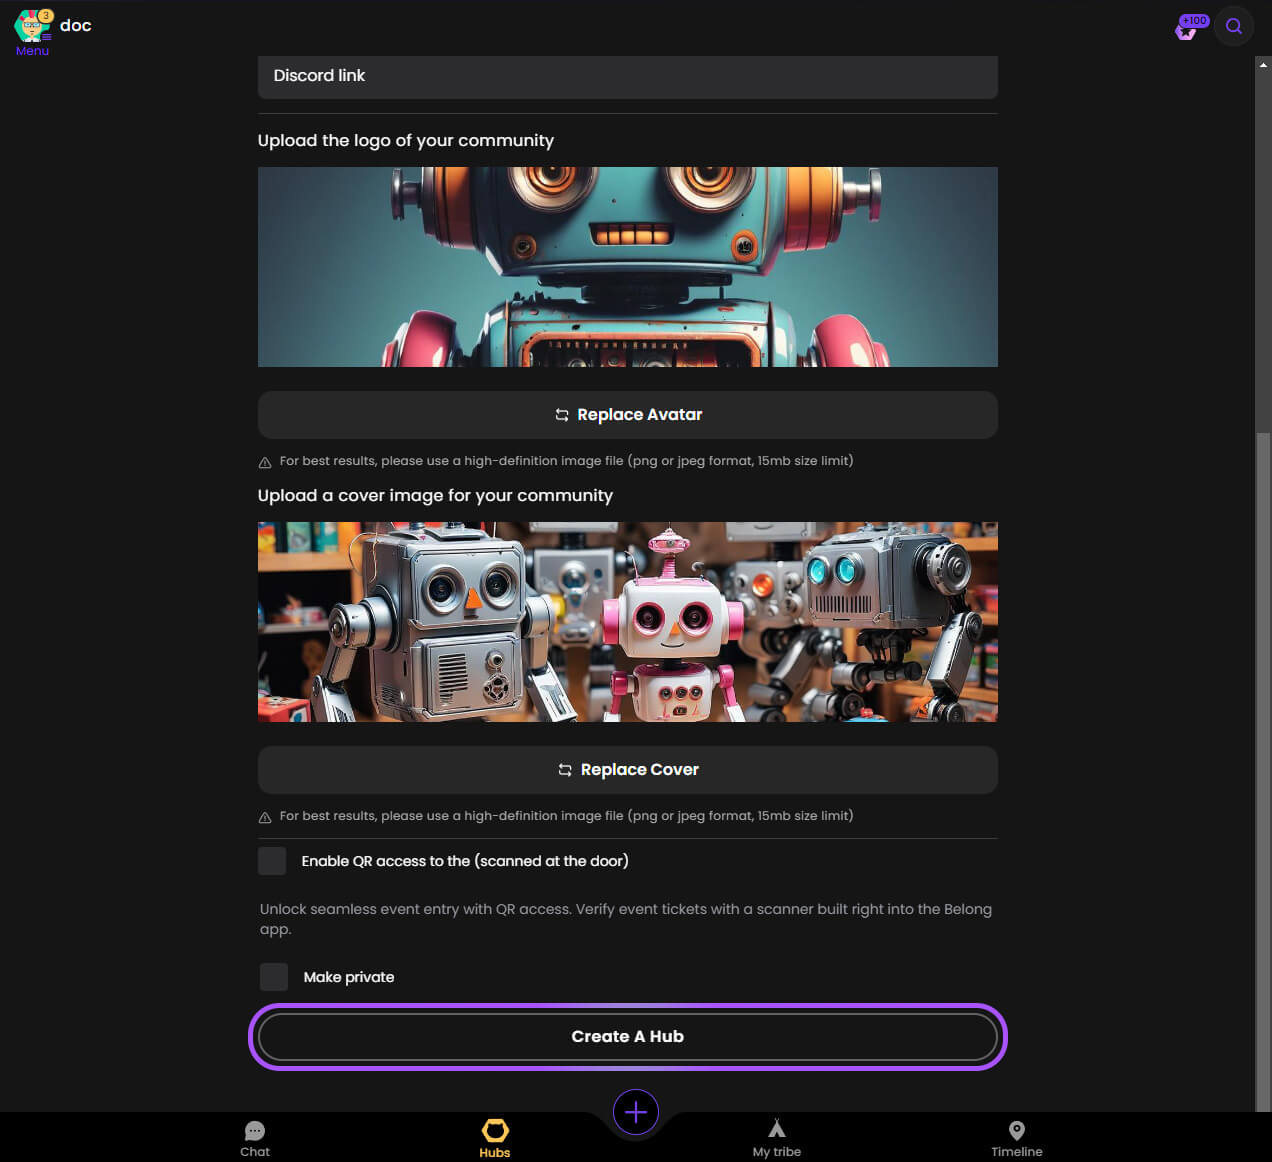
Step 12. Configure Hub
If creating a new hub, enter all required information carefully.
Event Configuration
Step 13. Event Details
Configure your event by:
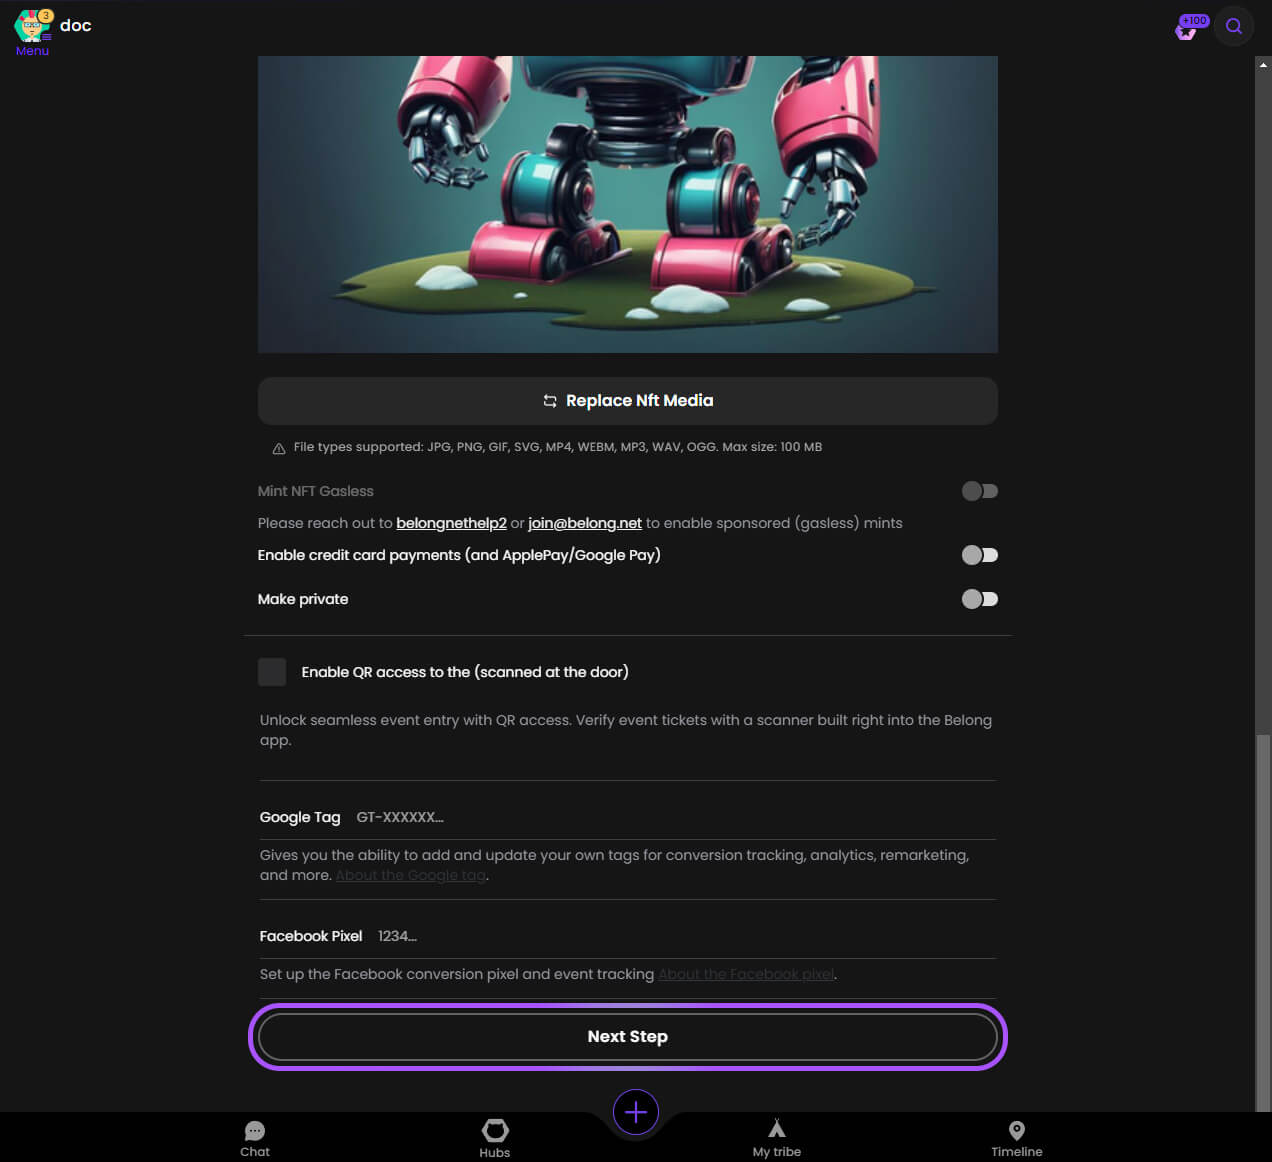
- Adding event information
- Uploading a cover image
- Selecting NFT product image
- Clicking "Next Step" when complete
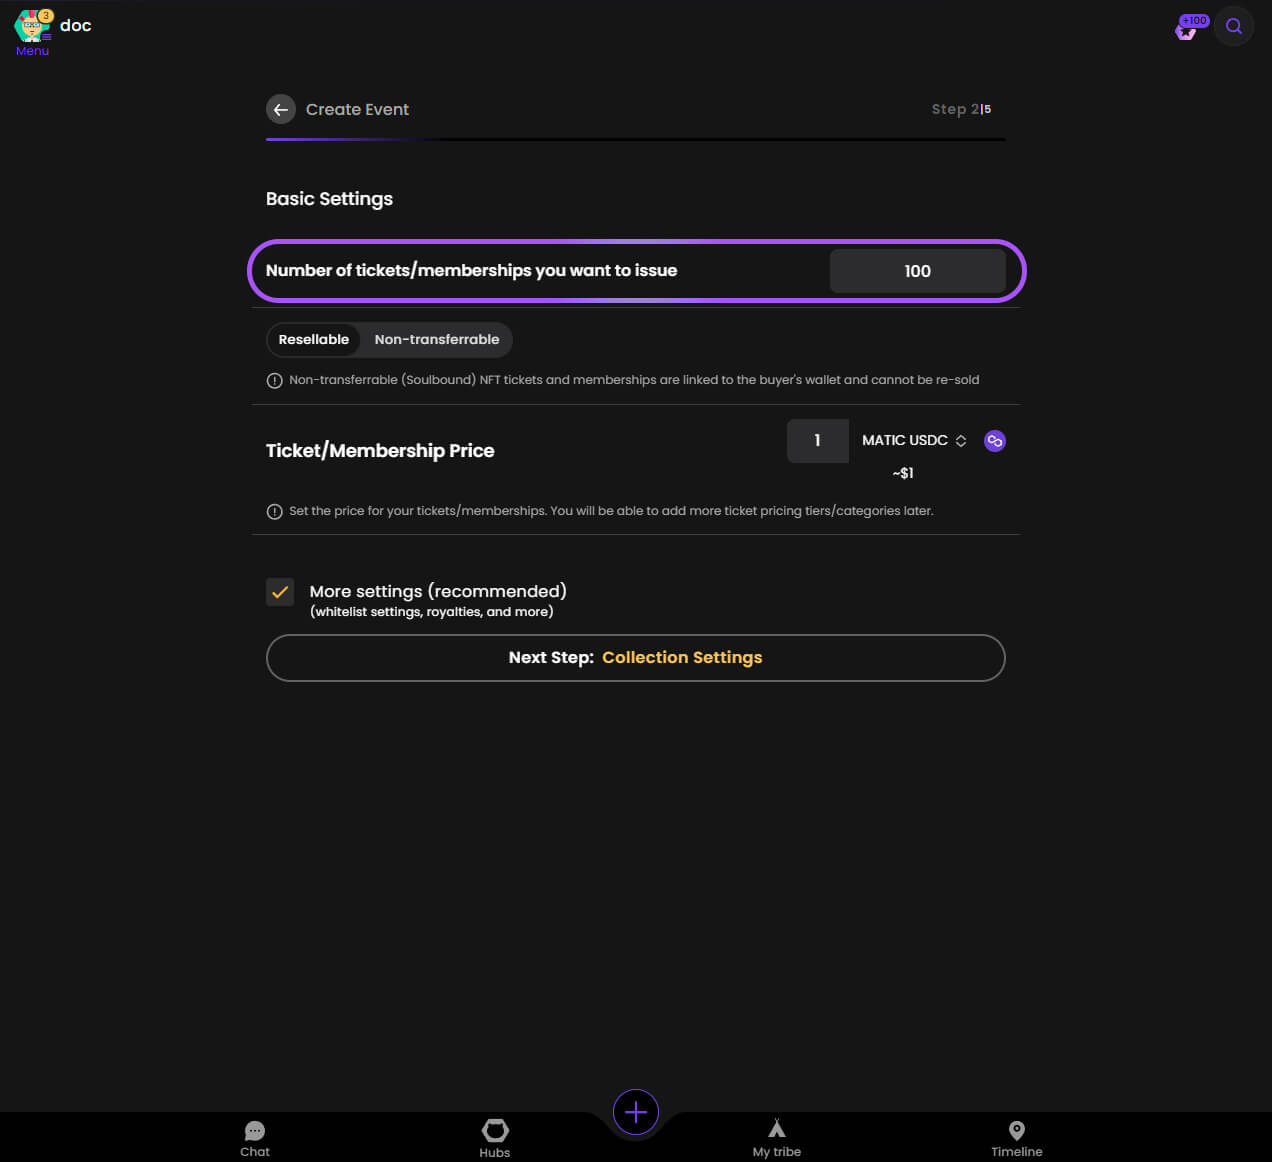
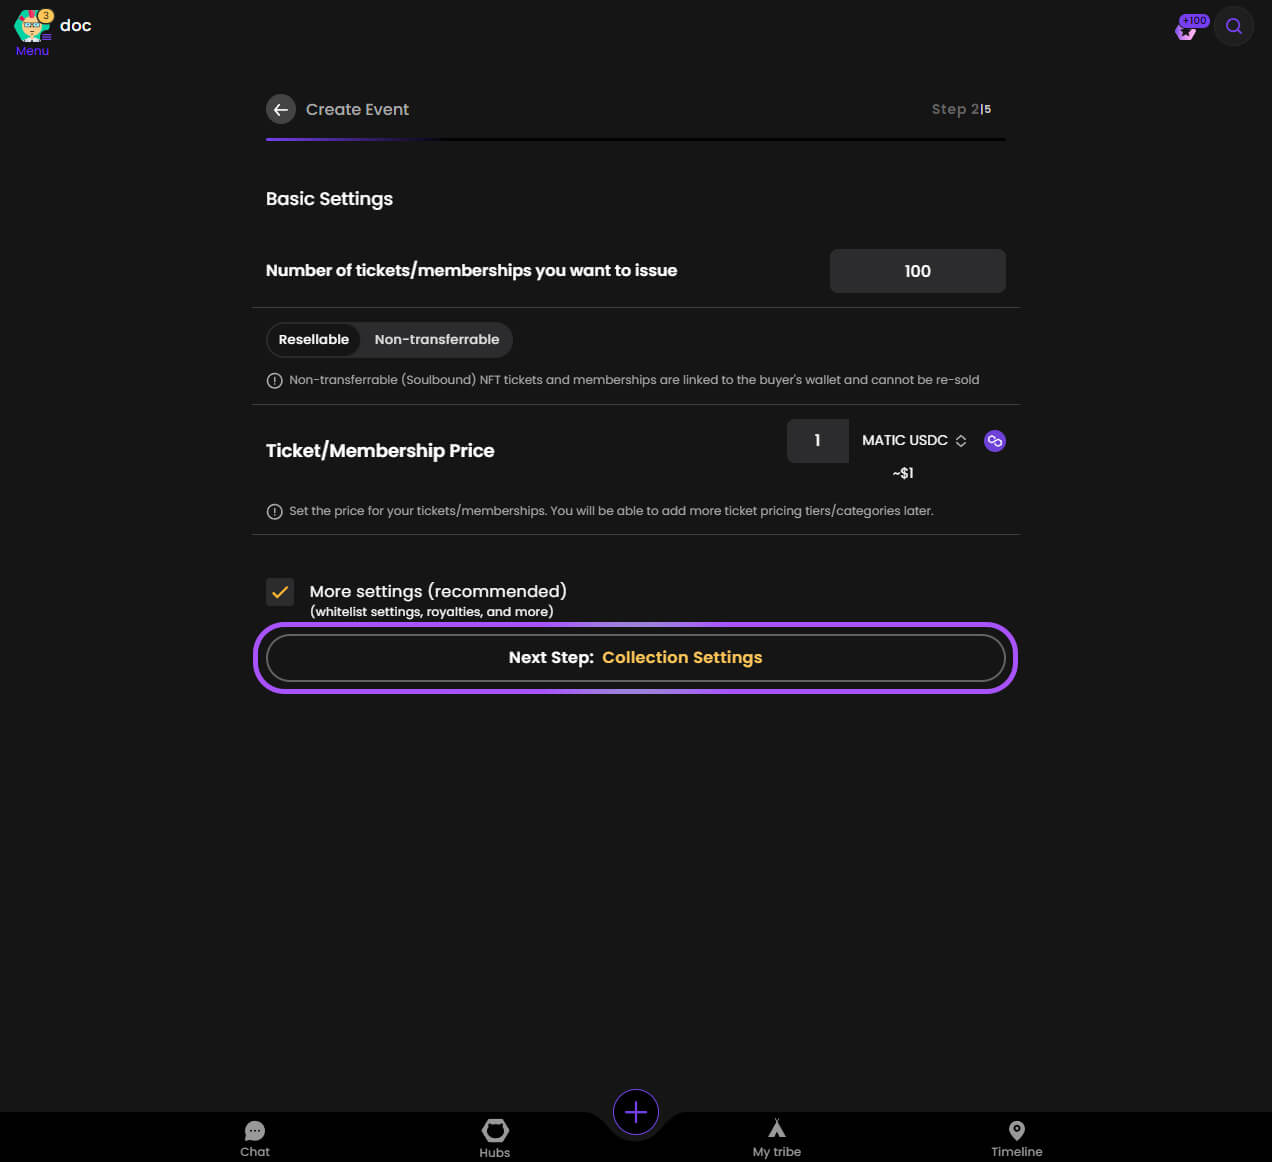
Step 14. Set Ticket Quantity
Specify how many tickets or memberships you want to make available.
⚠️ Choose carefully - this cannot be changed after creation!
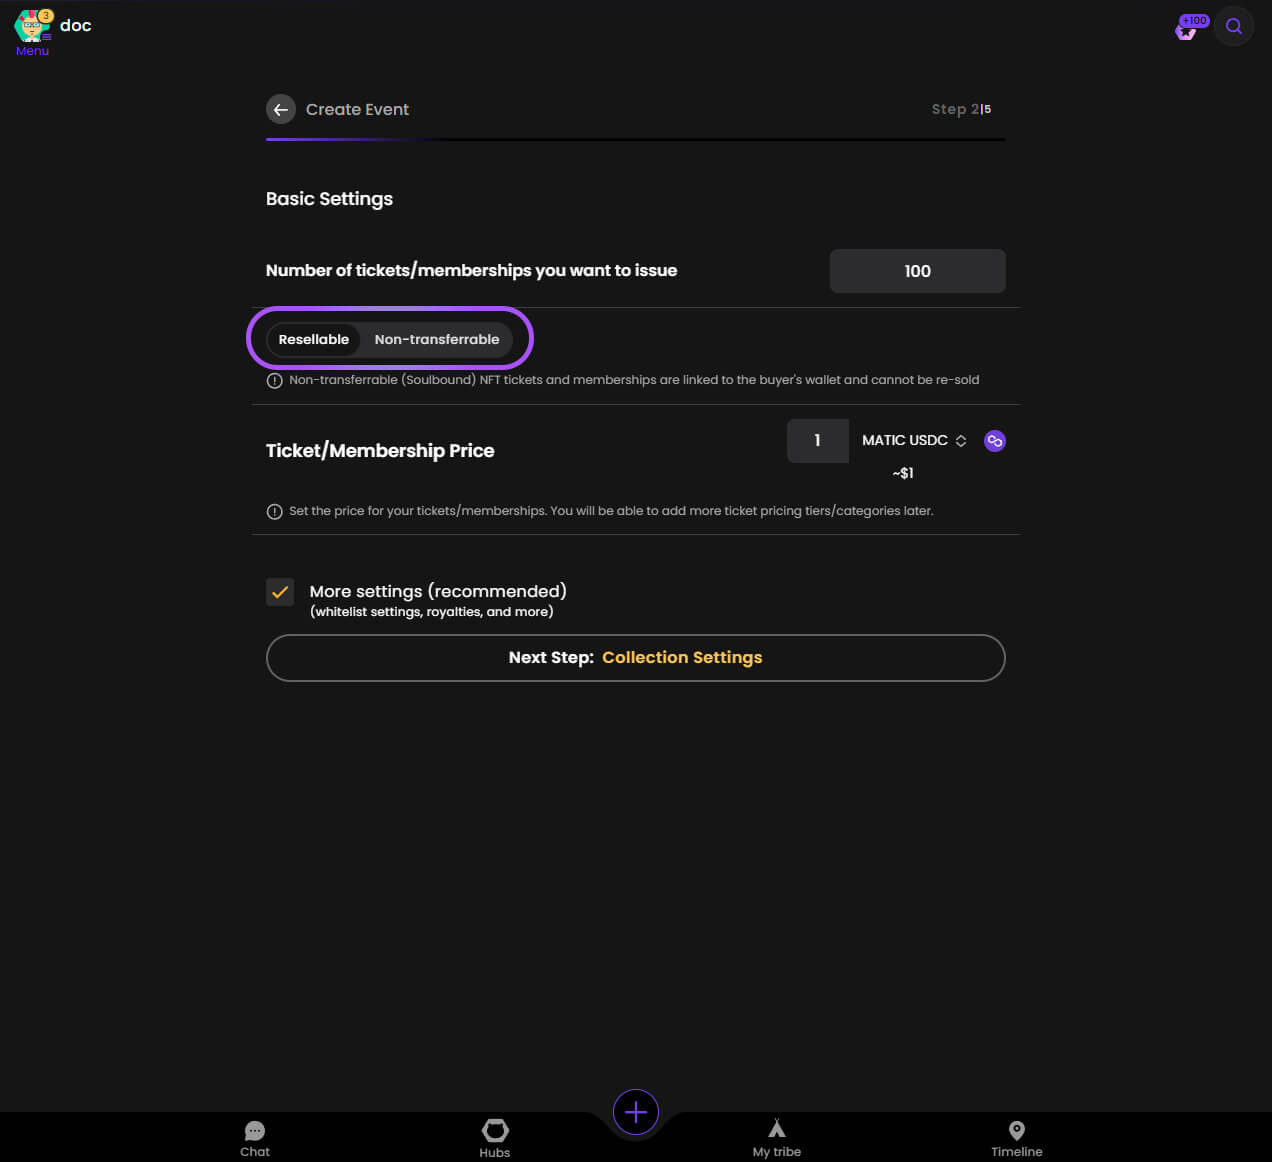
Step 15. Configure Resale Options
Decide if your tickets can be:
- Resold on secondary markets
- Transferred between wallets
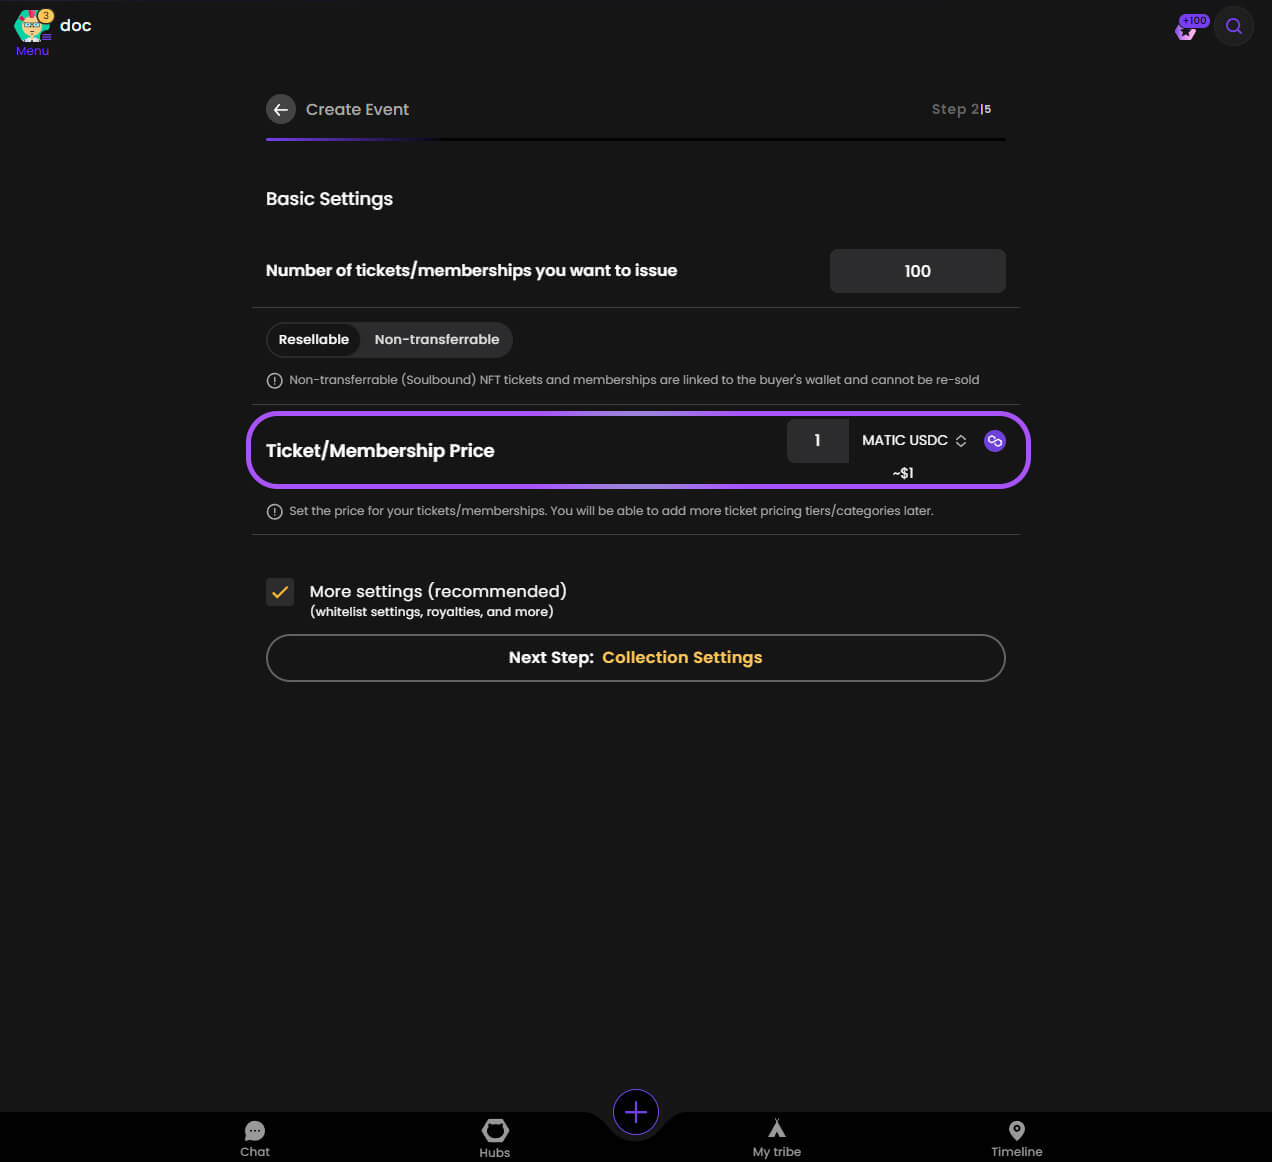
Step 16. Set Ticket Price
Define the price for your tickets/memberships.
💡 Consider your target audience and market conditions when setting prices.
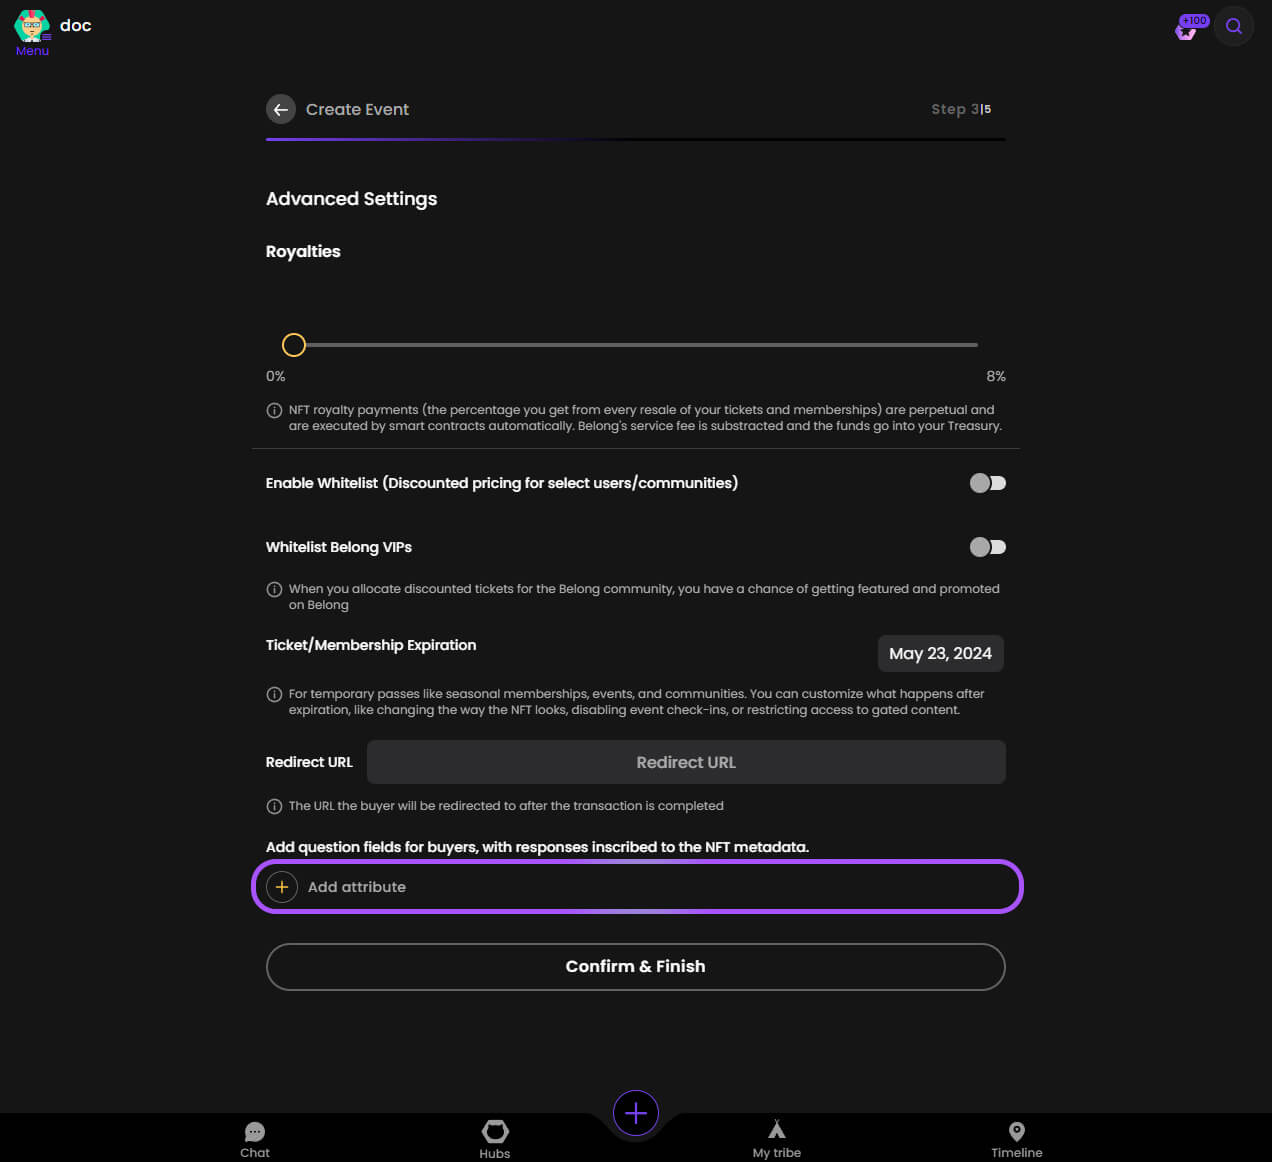
Advanced Settings
Step 17. Collection Settings
Proceed to advanced settings for additional configuration options.
Step 18. Set Royalties
Configure royalty payments for secondary sales (optional).
💰 Royalties provide ongoing revenue from secondary market sales.
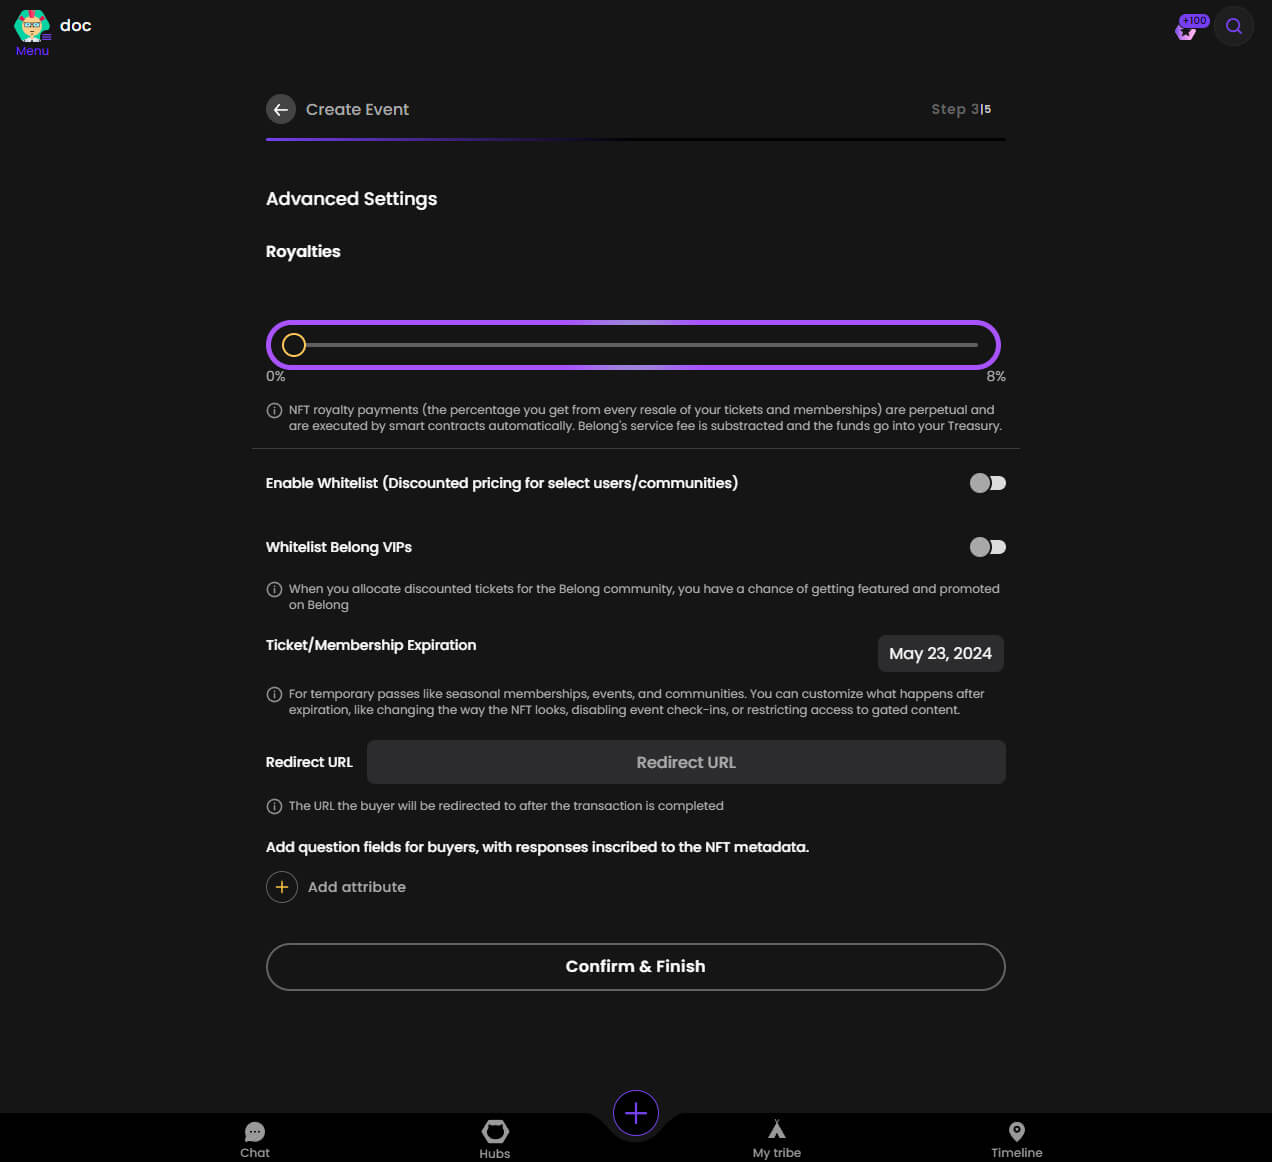
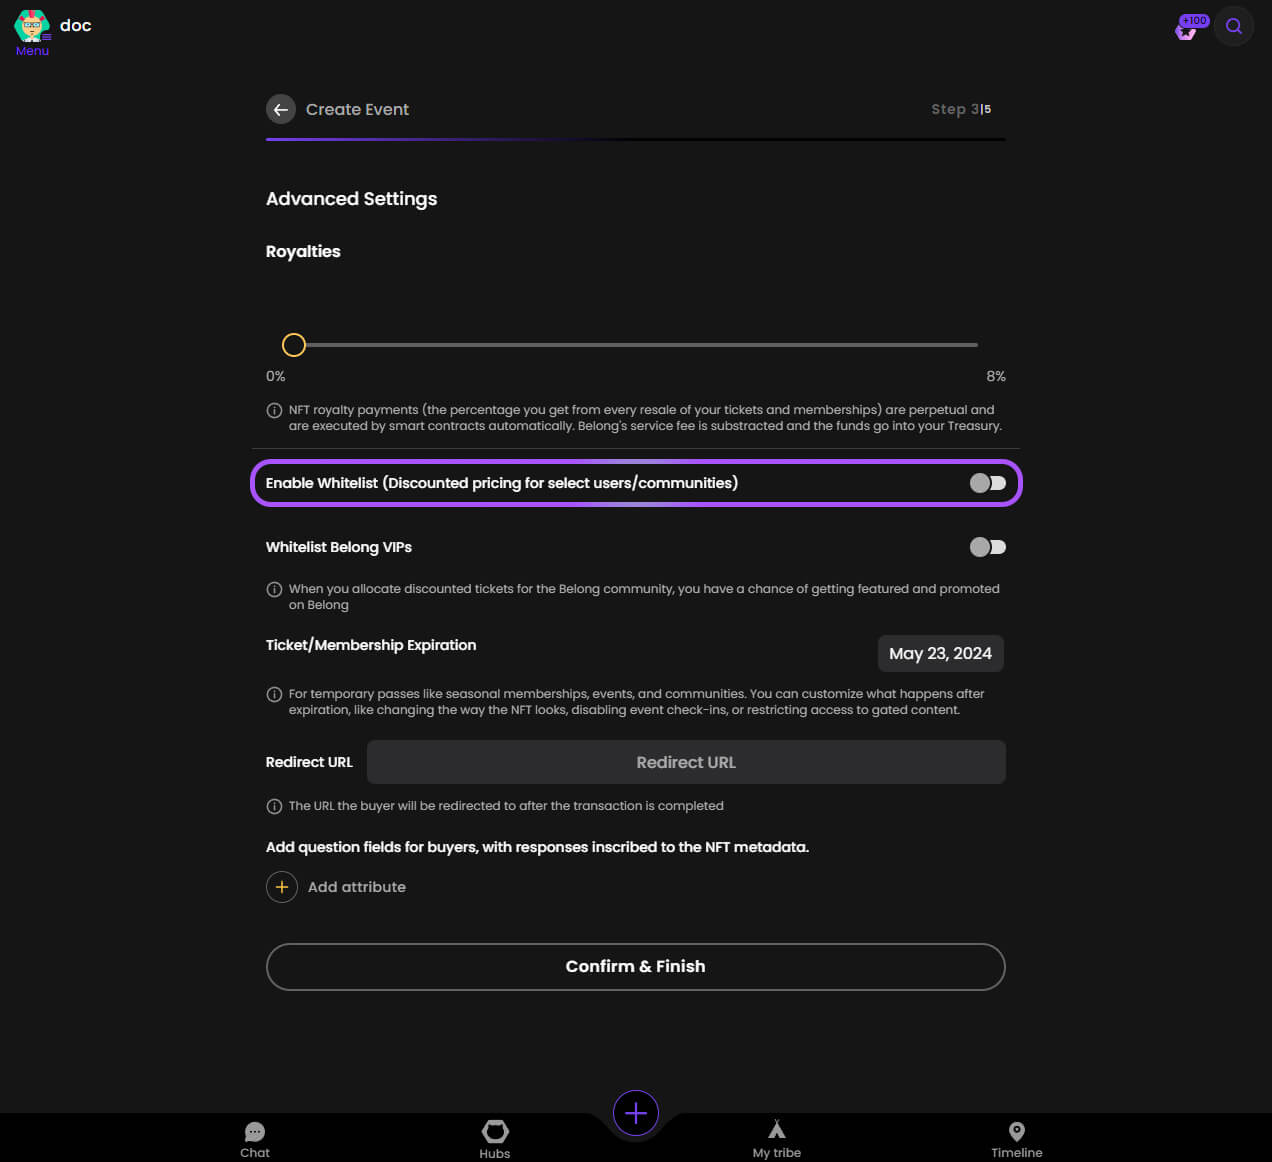
Step 19. Configure Whitelist
Set up whitelist for special access or discounted pricing (optional).
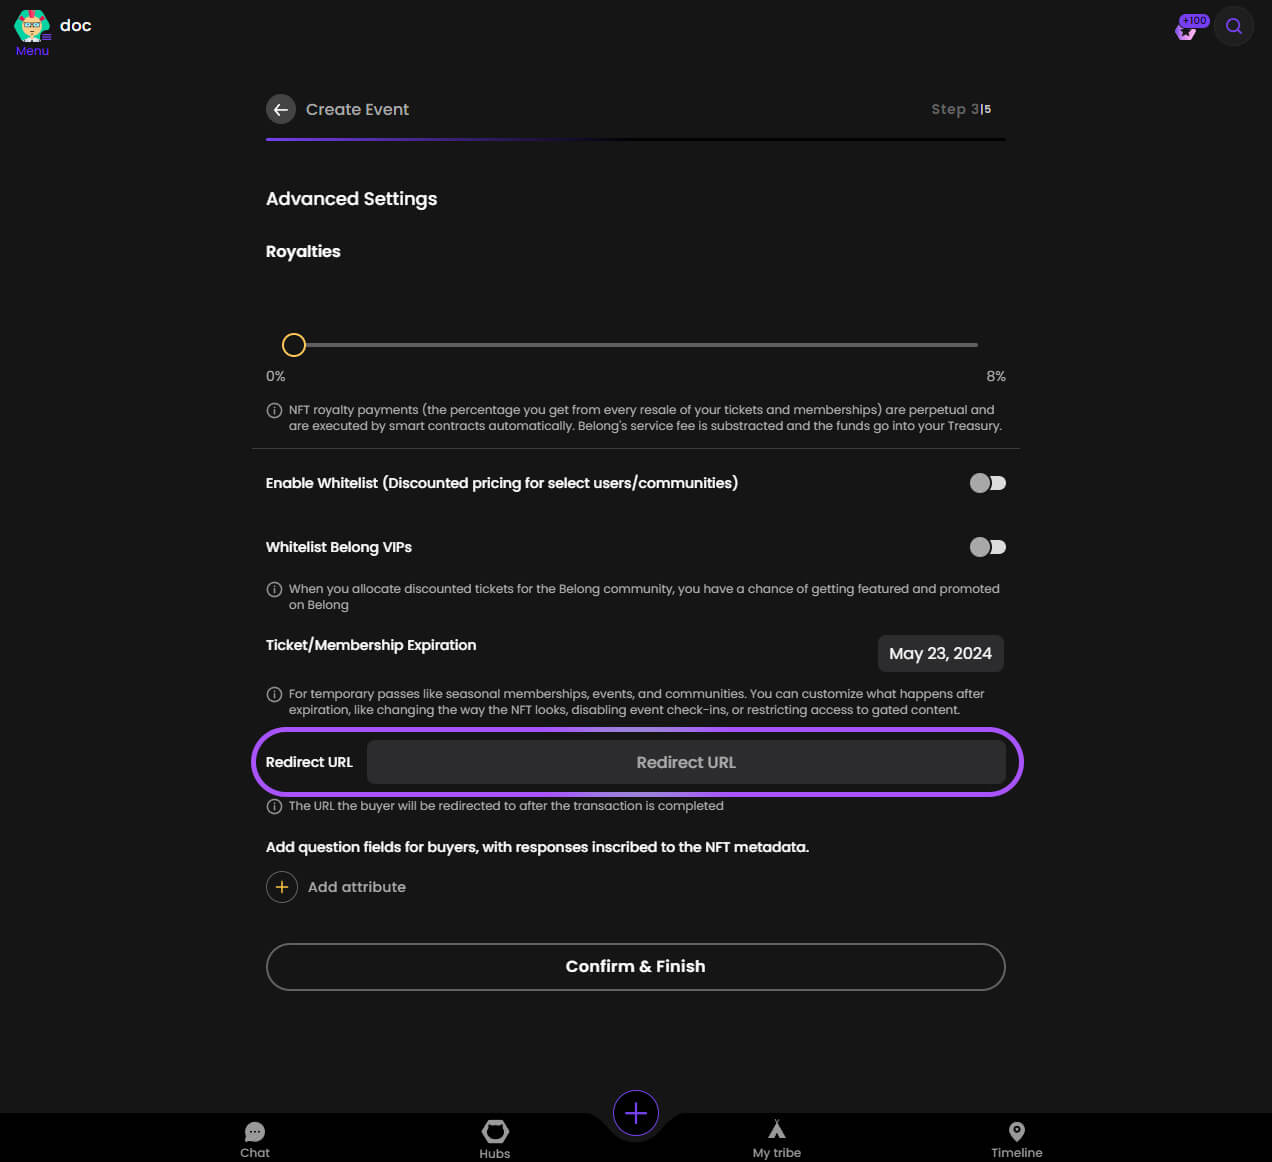
Step 20. Set Redirect URL
Configure where buyers will be directed after successful purchase.
Step 21. Add Custom Fields
Create custom fields to collect additional information from buyers.
📝 This data will be permanently stored in the NFT metadata.
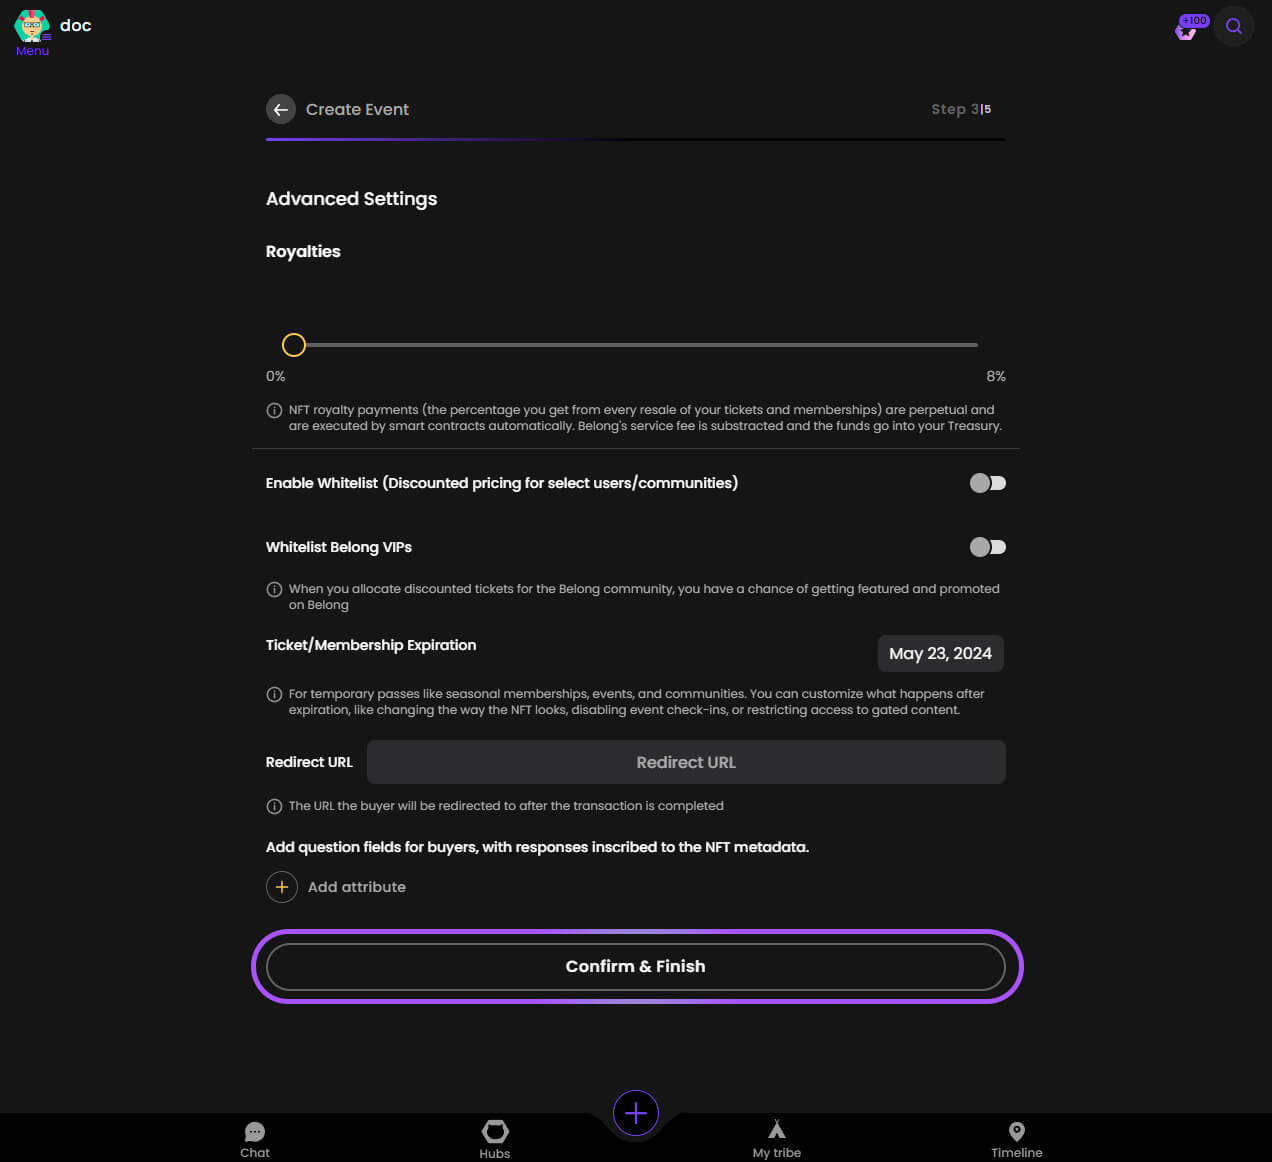
Finalizing Your Collection
Step 22. Create Smart Contract
Review all settings and click "Confirm & Finish" to create your smart contract.
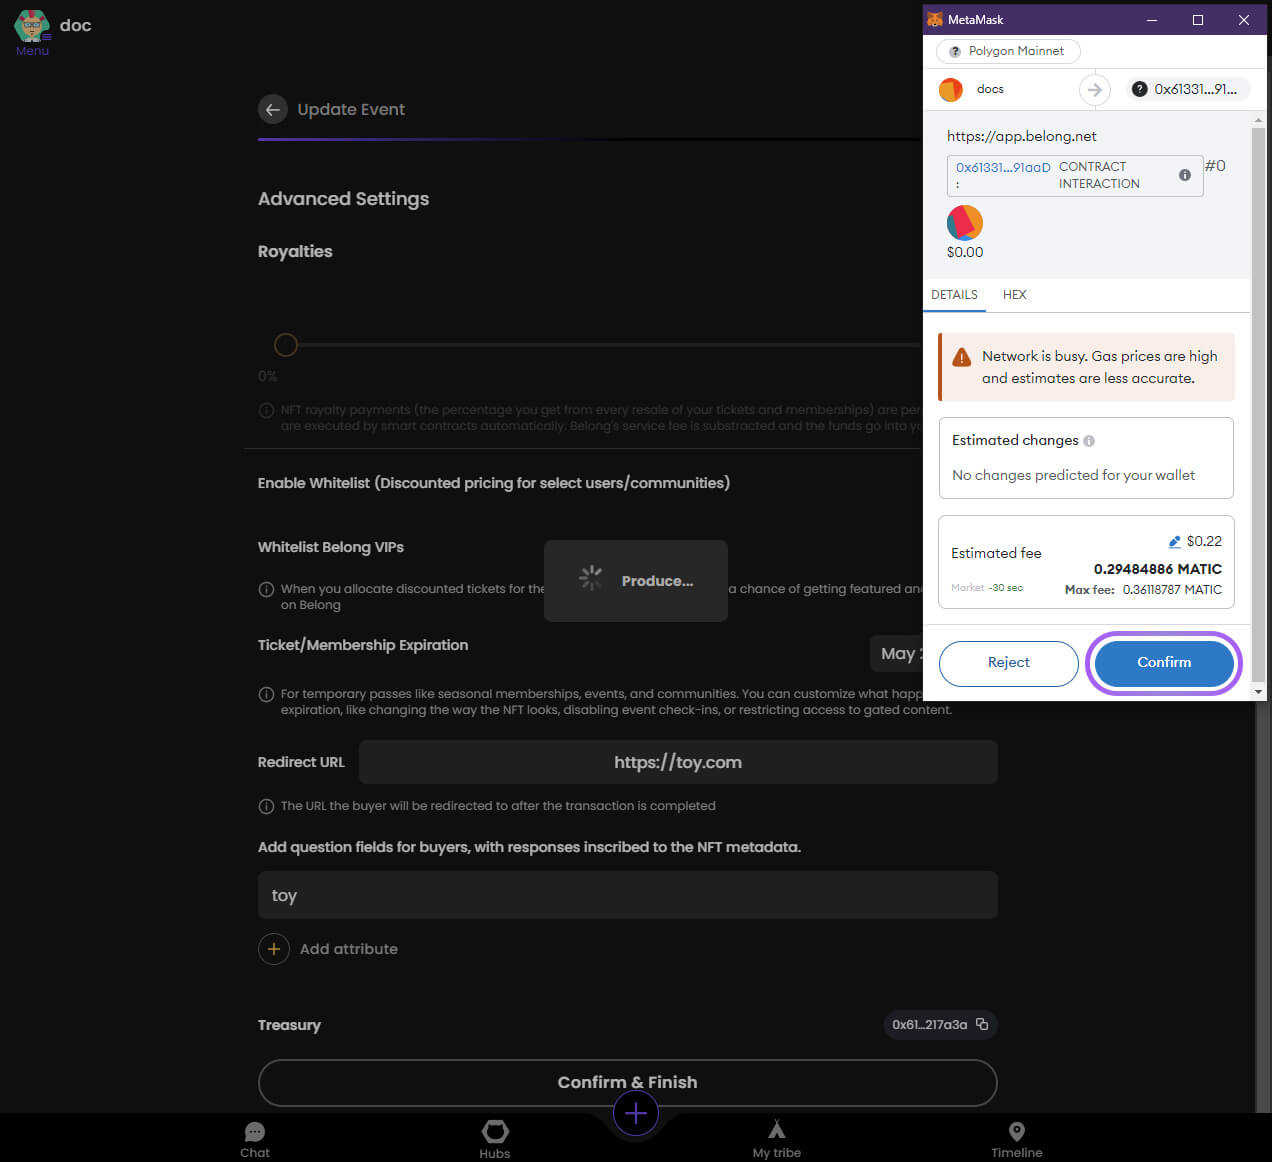
Step 23. Pay Network Fee
Confirm the network fee payment in MetaMask to deploy your contract.
⚠️ This transaction requires native token (POL/ETH/BLAST etc) for gas fees.
Step 24. Success!
🎉 Congratulations! Your NFT collection is now live and ready for minting!
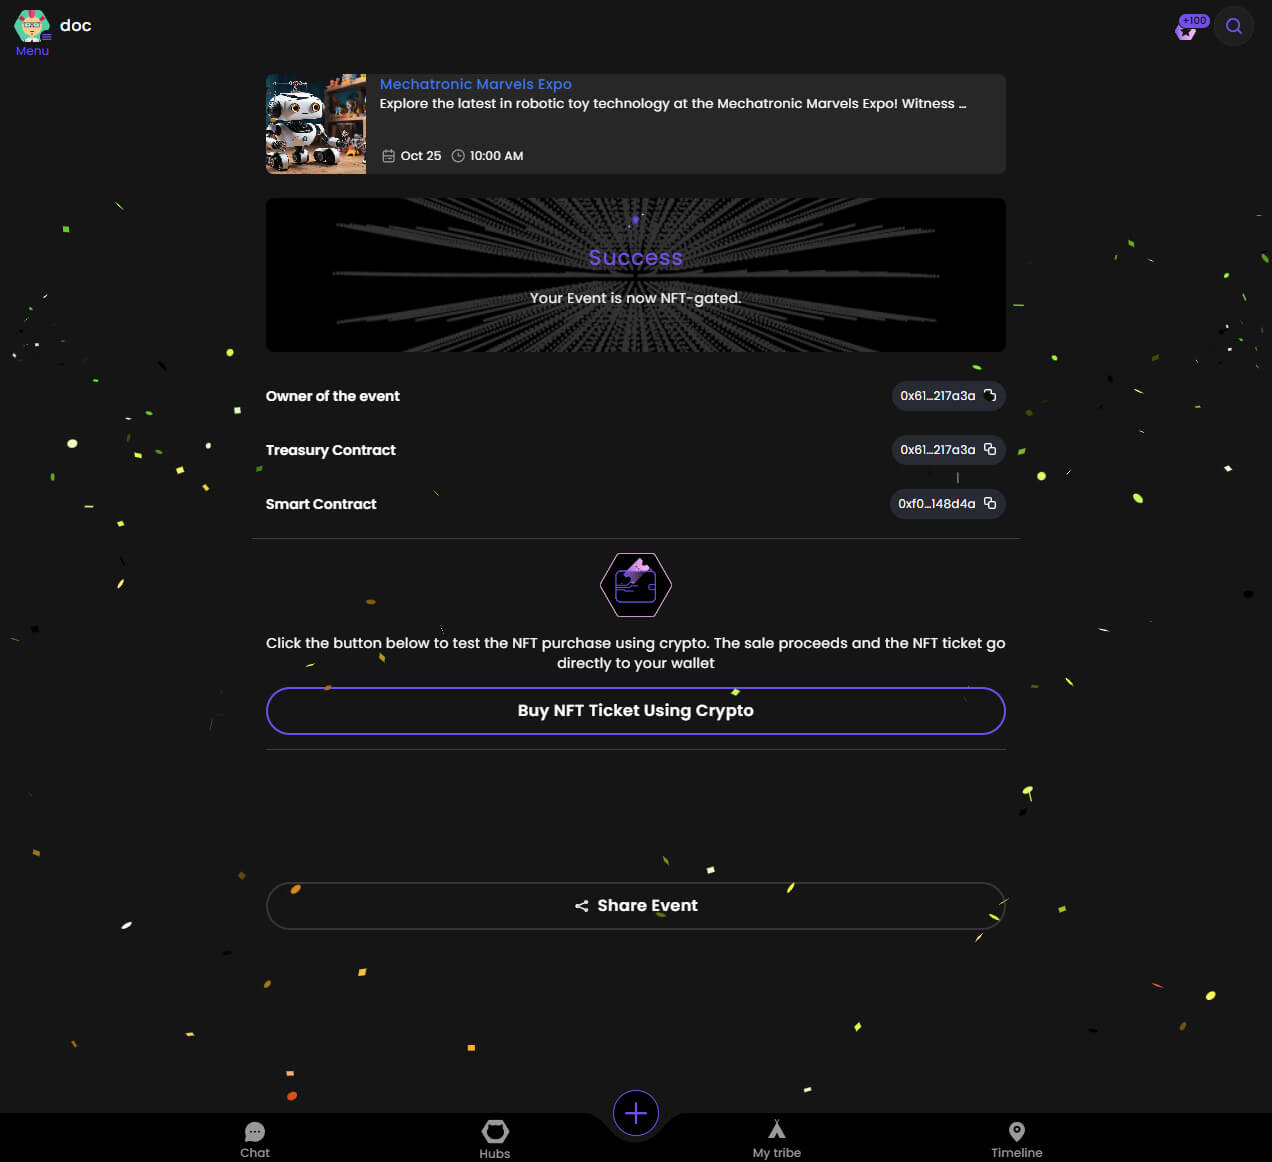
What's Next?
Now that your collection is created, you can:
- Share the minting link with your community
- Monitor sales and engagement
- Manage whitelist access if enabled
- Track royalties from secondary sales